ATTAZoo G for Zoom
ATTAZoo G for ZoomATTAZoo G for Zoom Installation ManualOverviewCopyright/PrecautionsNotation in This ManualChapter 1. Summary of This Product1.1 Product Summary1.1.1 What is ATTAZoo G for Zoom?1.1.2 CautionChapter 2. Installation and Removal of This Product2.1 Installation of This Product2.1.1 Installation Workflow2.1.2 Log in to Garoon2.1.3 Proxy API configuration2.1.4 Registering a Zoom facility2.1.5 Apply "ATTAZoo G for Zoom" to Garoon2.1.6 Activate This Product2.1.7 User settings (Optional)2.1.8 Applying the License Key2.1.9 Applying for a linked Zoom account2.2 Removing this product2.2.1 How to remove this product2.2.2 Uninstalling the ATTAZoo G for Zoom Add-onATTAZoo G for ZoomUser's ManualOverviewCopyright/PrecautionsNotation in This ManualChapter 1. Summary of This Product1.1 Product Summary1.1.1 What is ATTAZoo G for Zoom?1.1.2 CautionChapter 2. Operation method2.1 About Zoom Conference Booking2.1.1 Register Zoom meeting schedule2.1.2 How to change your Zoom meeting reservation2.1.3 How to delete a Zoom meeting reservation
ATTAZoo G for Zoom Installation Manual
Overview
Thank you very much for purchasing our product "ATTAZoo G for Zoom". (We will refer to "ATTAZoo G for Zoom" as "this product" for the following explanation. This product is a plug-in for integrating the Garoon scheduling function with the Zoom meeting reservation system. This manual describes how to install this product, as well as some points to note. Please read it before using the product. Please note that the screens shown are only examples of operations. Please note that the contents displayed on the screen may differ depending on your operating environment.
Copyright/Precautions
The names of companies and products mentioned in this manual are trademarks or registered trademarks of their respective owners. No part of this manual may be copied or reproduced in any form or by any means without permission. The contents of this manual and product specifications are subject to change without notice. Although every effort has been made to ensure that the contents of this manual are correct, if you notice any unclear points, errors, omissions, or misprints, please contact us. However, if you find any unclear points, errors, omissions, or missing pages, please contact us.
Notation in This Manual
| Notation Target | Notation |
|---|---|
| Menus, Icons, Buttons, Windows, Tabs | The notation is enclosed in []. (e.g.) Click [OK]. |
| Keys on the keyboard | Use <> to enclose the text. (e.g.) Press the <Tab> key on your keyboard. |
| References | Chapters, sections, paragraphs and headings should be enclosed in "". (Example) Refer to "Chapter 2.1 Login and Logout". |
Chapter 1. Summary of This Product
1.1 Product Summary
This product is a Garoon plugin that links the meeting reservation function of Zoom with the Zoom meeting reservations set up on Garoon. You can book meetings on your Garoon schedule.
1.1.1 What is ATTAZoo G for Zoom?
This is a Garoon plugin that allows you to integrate Garoon's scheduling function with Zoom's meeting reservation function.
- You can book a meeting on a Garoon schedule and a Zoom meeting all at once.
- Check for duplicate Zoom conferences and Zoom webinars when booking a meeting.
The product name may change upon official release.
1.1.2 Caution
- Please do not delete the [Zoom URL] and [Meeting ID] in the notes on Garoon. . Unexpected behavior may occur if deleted.
Refer to the user's manual for details.
Chapter 2. Installation and Removal of This Product
2.1 Installation of This Product
This product runs as a Garoon plugin. In order to apply this product, you need to be able to use the plug-in function of the cloud version of Garoon. Please make sure in advance that the environment you are using can use the Garoon plugin function.
2.1.1 Installation Workflow
We will check the installation process to apply this product to Garoon and integrate it with Zoom's conference booking. The installation will be done in the following order.
- Log in to Garoon
- Proxy API Registration
- Registering a Zoom facility
- Apply "ATTAZoo G for Zoom" to Garoon
- Activate this product
- User settings
- Applying the License Key
- Setting up a Zoom account to be linked
Complete the settings to complete the configuration of the product. After the settings are complete, the product will be ready for use.
2.1.2 Log in to Garoon
First, log in to the Garoon environment where you want to apply this product. Garoon is groupware provided by Cybozu. This section explains how to log in to the Garoon environment.
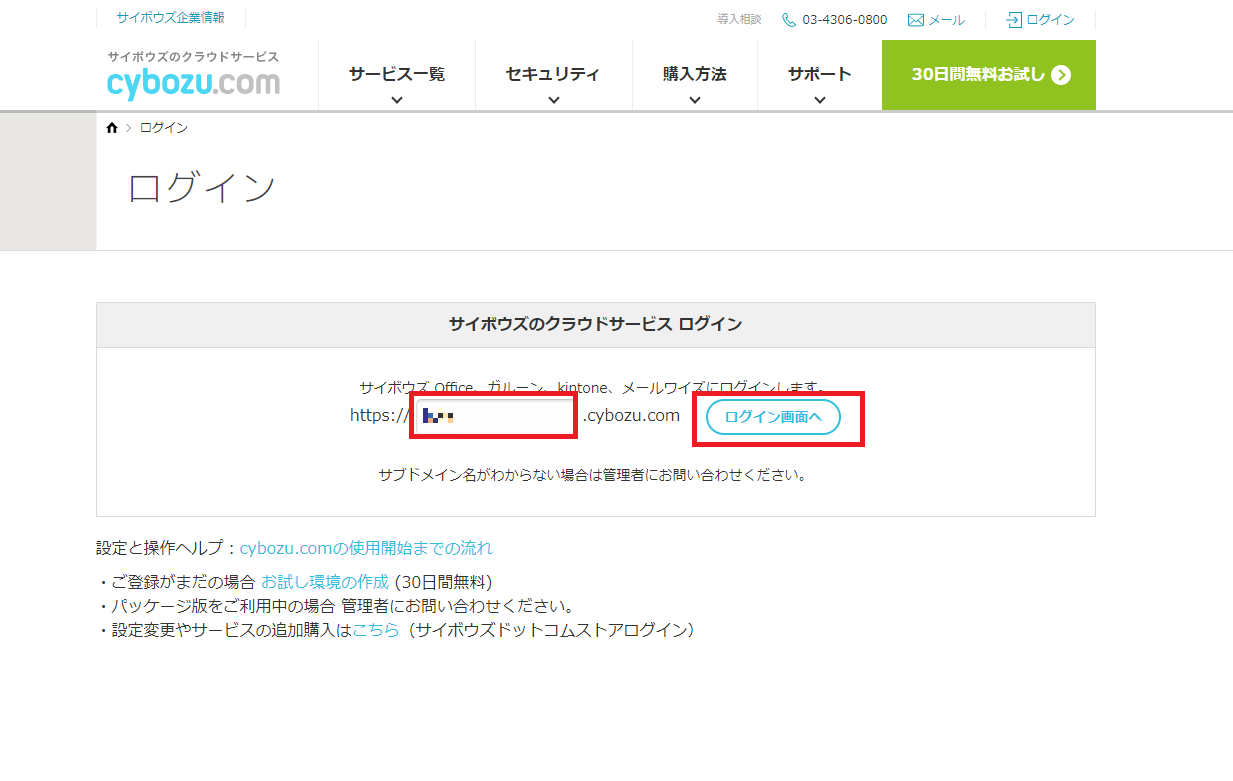
- Access from the common login page of Cybozu.com Access the following URL with your browser. https://www.cybozu.com/jp/login/
- Enter your subdomain and press [ログイン画面へ].
Enter the subdomain of the Garoon environment you are using.
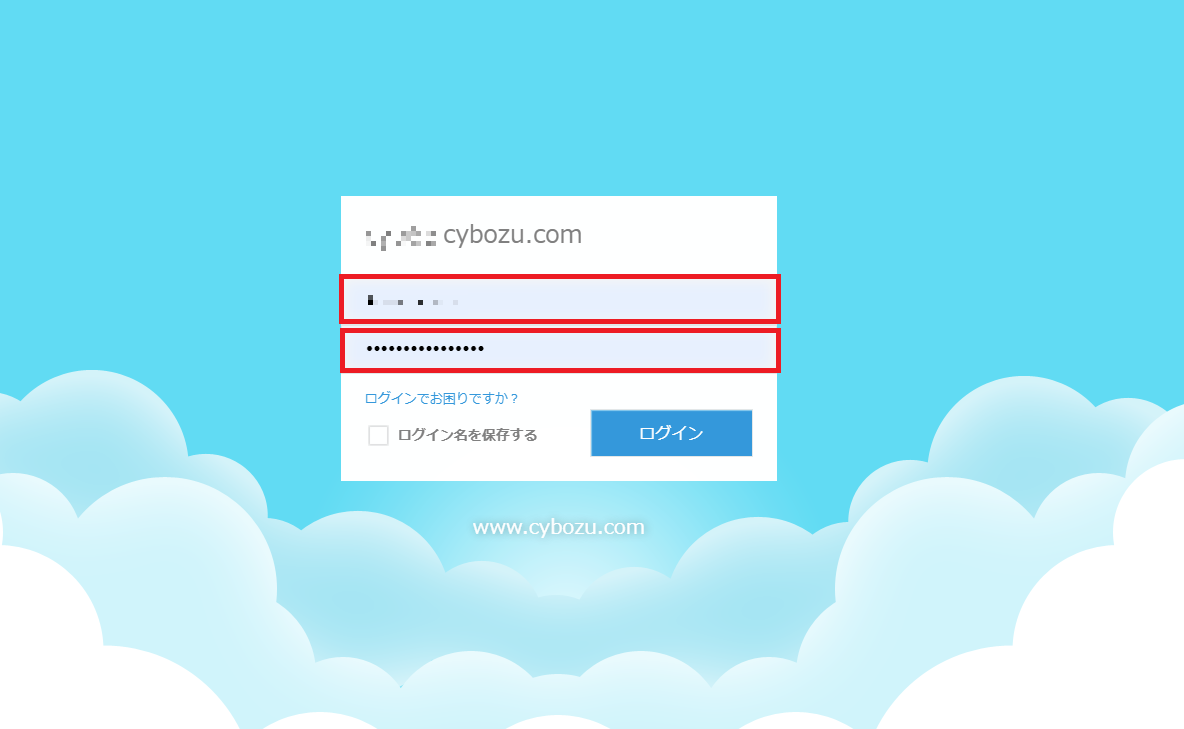
- Enter your user ID and password.
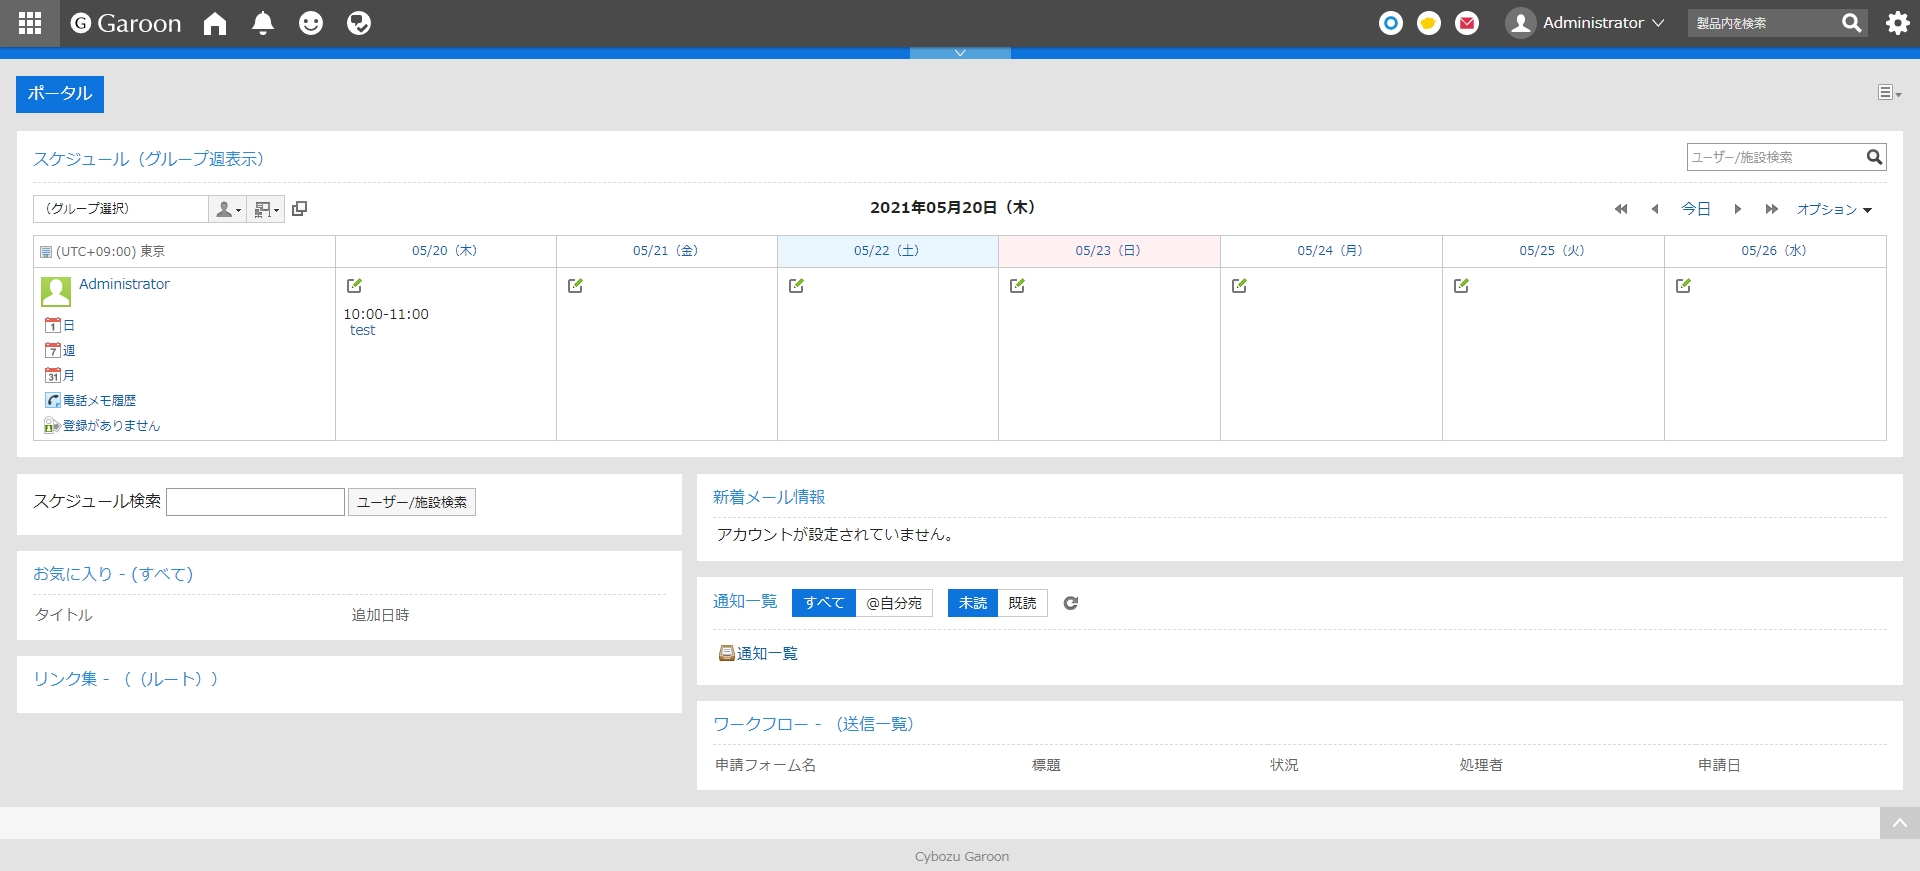
- Select [Garoon].
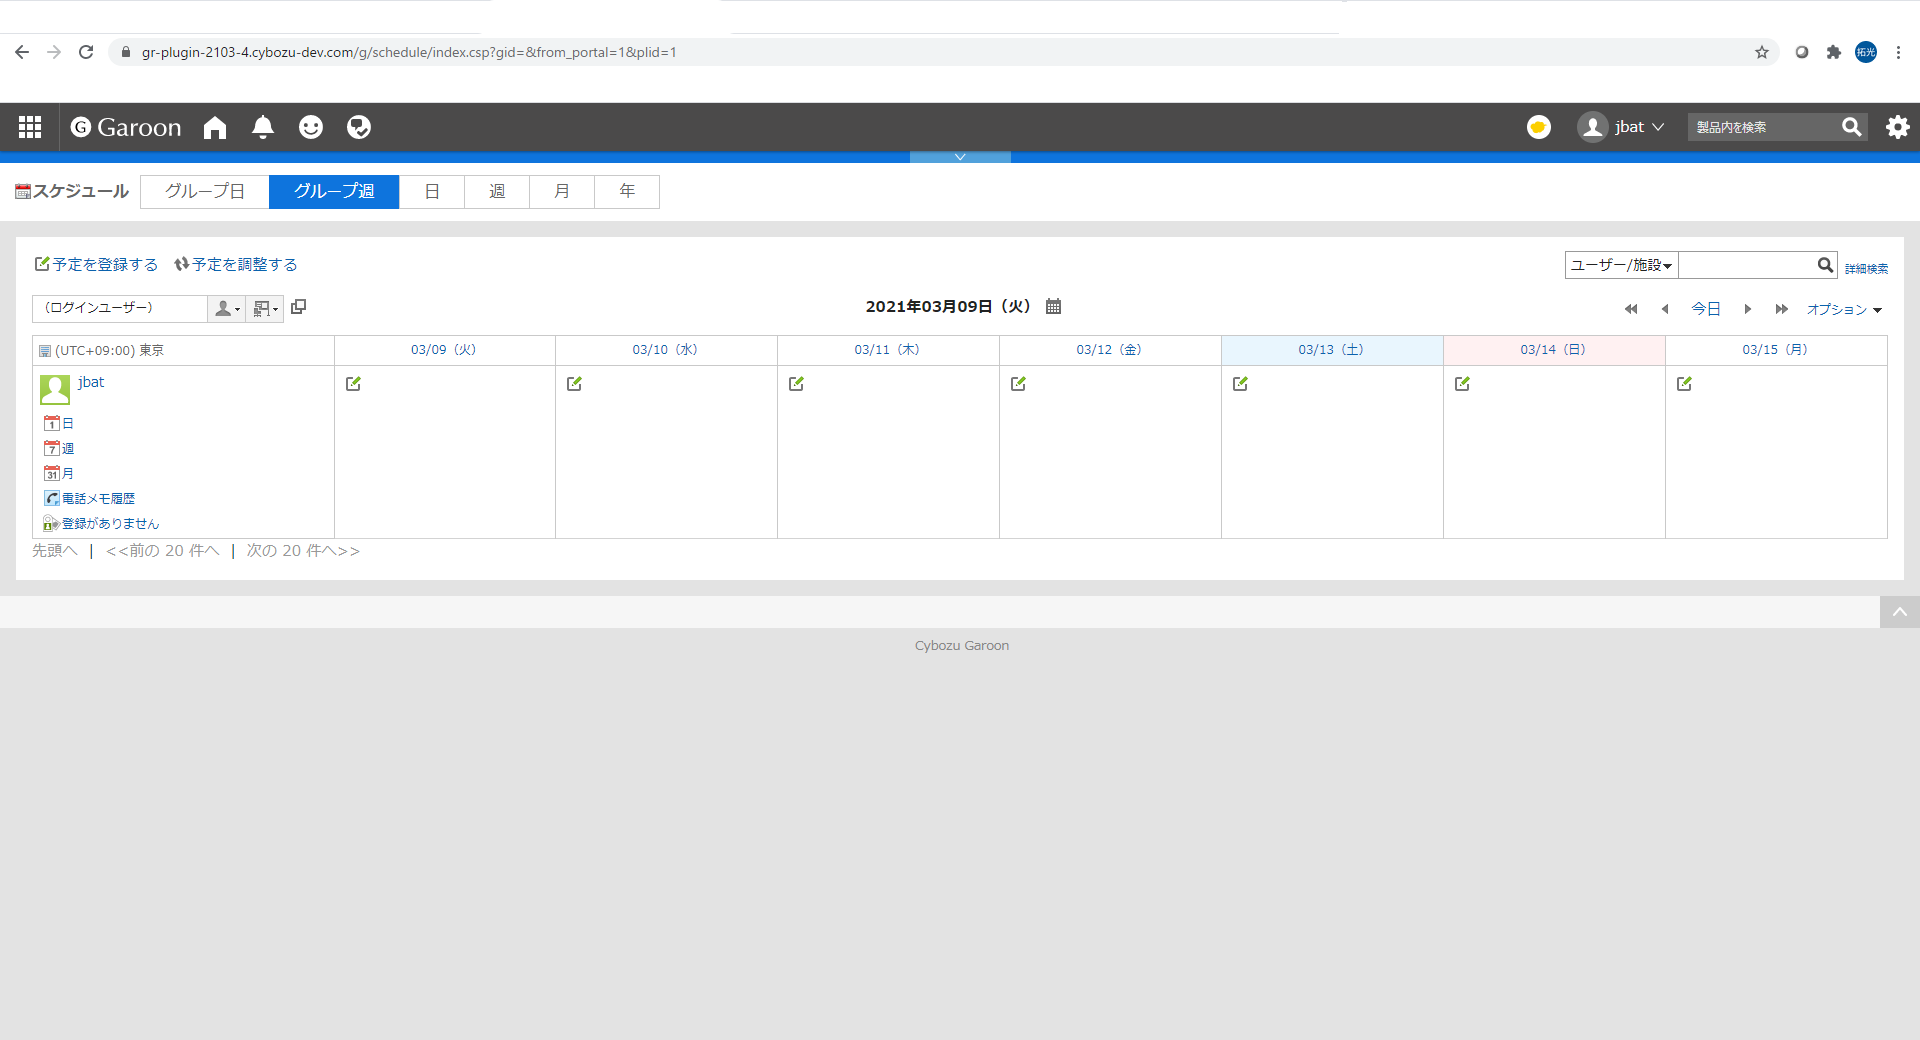
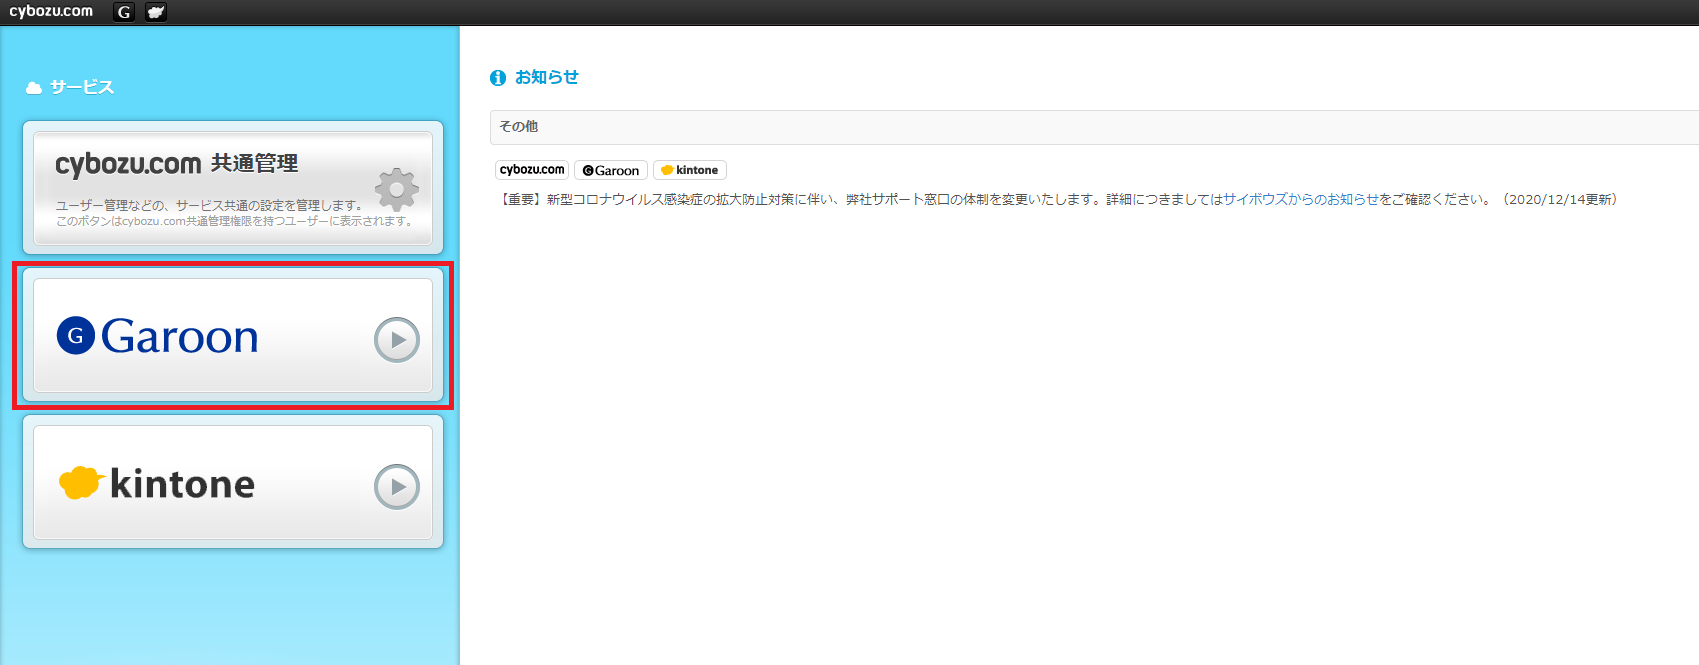 The User screen will be displayed.
2.1.3 Proxy API configuration
In order to access external services from Garoon, you need to set up a proxy API. Configure the following proxy code.
- ZoomPluginPost
- ZoomPluginGet
- ZoomPluginPatch
- ZoomPluginDelete
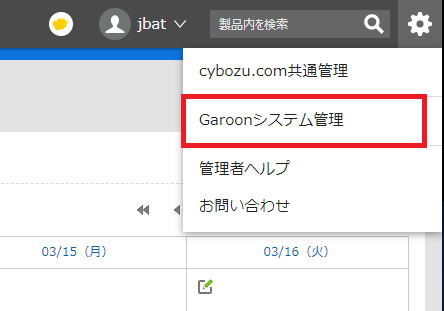
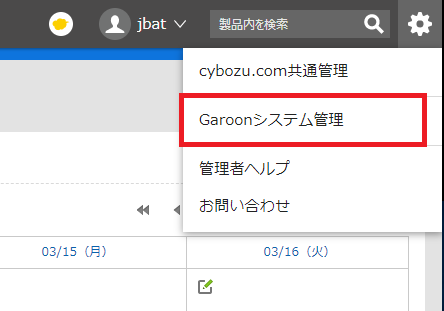
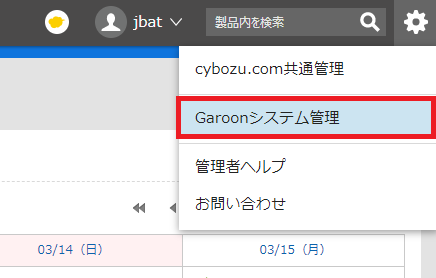
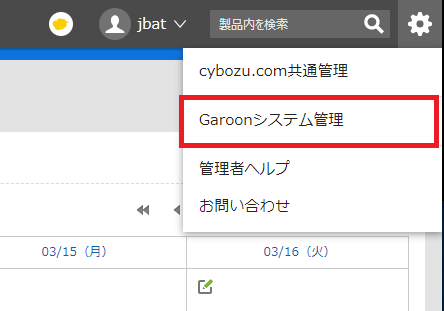
On the Garoon screen, Click on the gear icon and click [Garoonシステム管理].
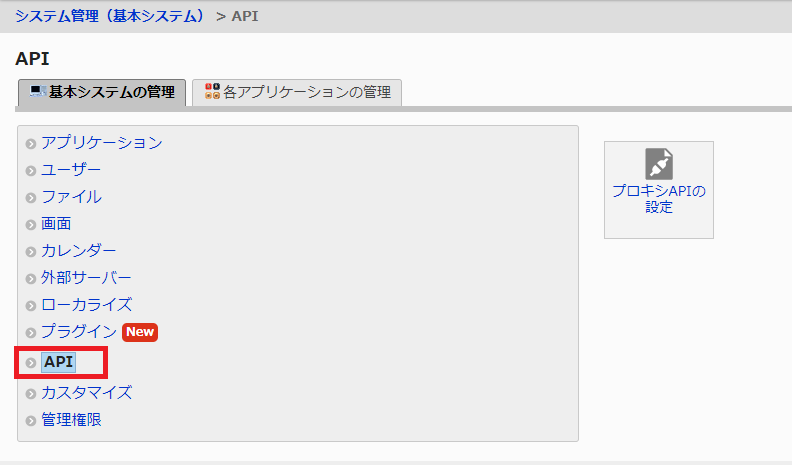
Click [基本システムの管理] on the system administration screen, and then click [API].
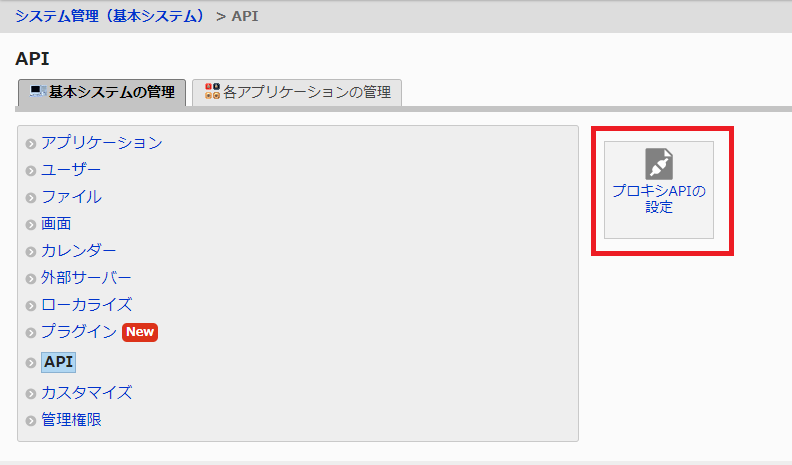
Press [プロキシAPIの設定].
Add ZoomPluginPost. In the [プロキシAPIの設定] screen, click [追加する].

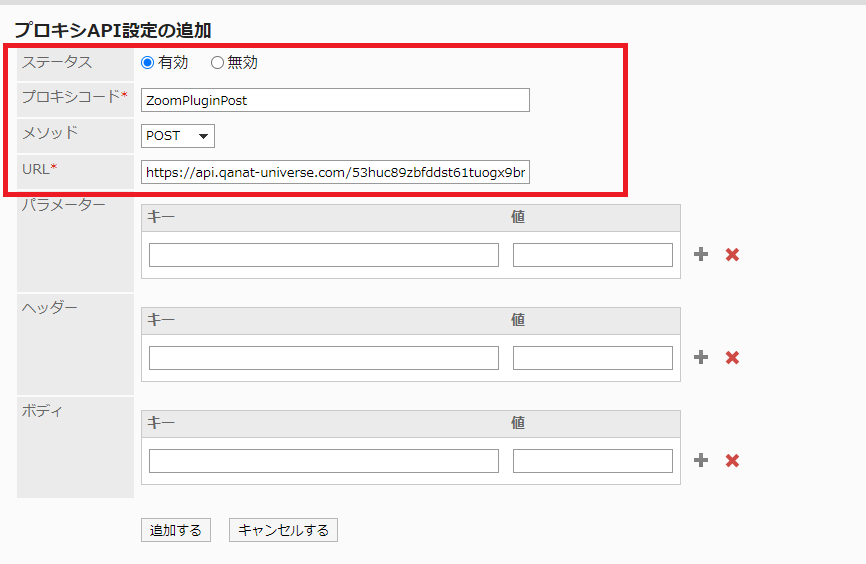
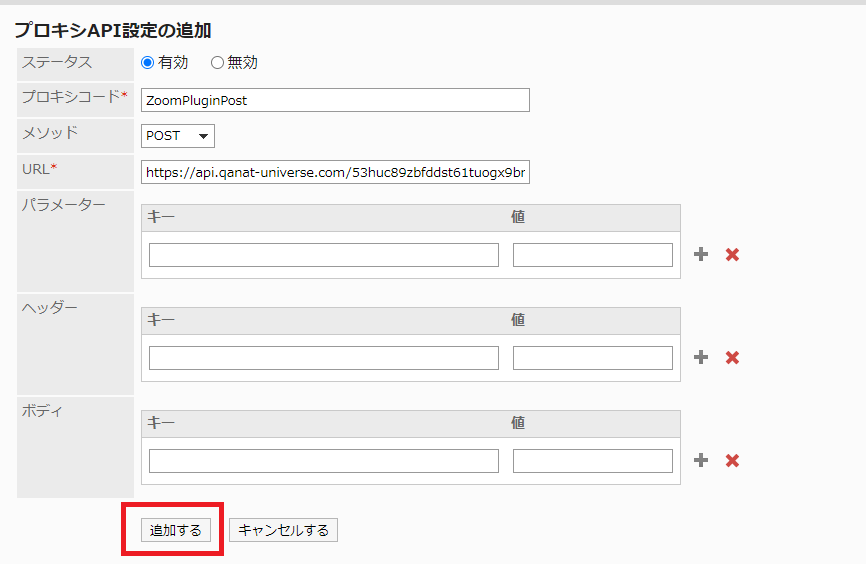
On the Add Proxy API Settings screen, enter the following information - ステータス (set [有効]) - プロキシコード (enter "ZoomPluginPost") - メソッド (select "POST") - URL (enter "https://api.qanat-universe.com/53huc89zbfddst61tuogx9bnedkjbj02")
Confirm the settings and press [追加する].
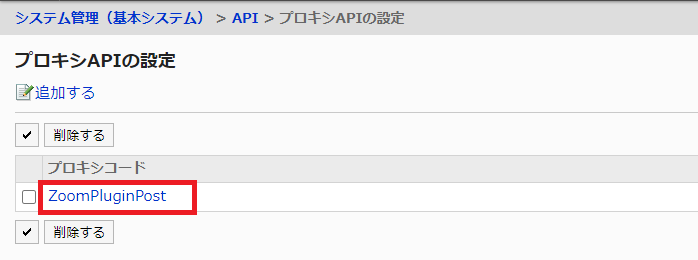
Click on the added [ZoomPluginPost] and confirm the contents.
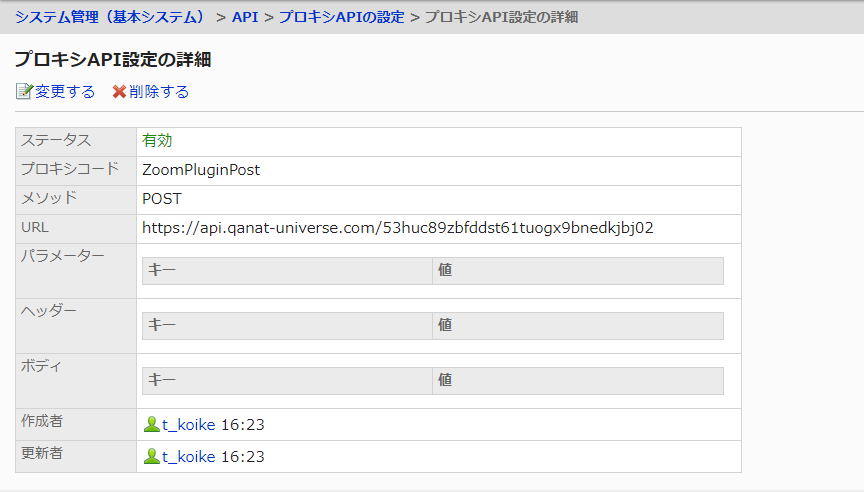 If it is registered correctly, it will look like the image.
Add ZoomPluginGet On the [プロキシAPIの設定] screen, click [追加する] and enter the following information. - ステータス (set to [有効]) - プロキシコード (enter "ZoomPluginGet") - メソッド (select "GET") - URL (enter "https://api.qanat-universe.com/53huc89zbfddst61tuogx9bnedkjbj02")
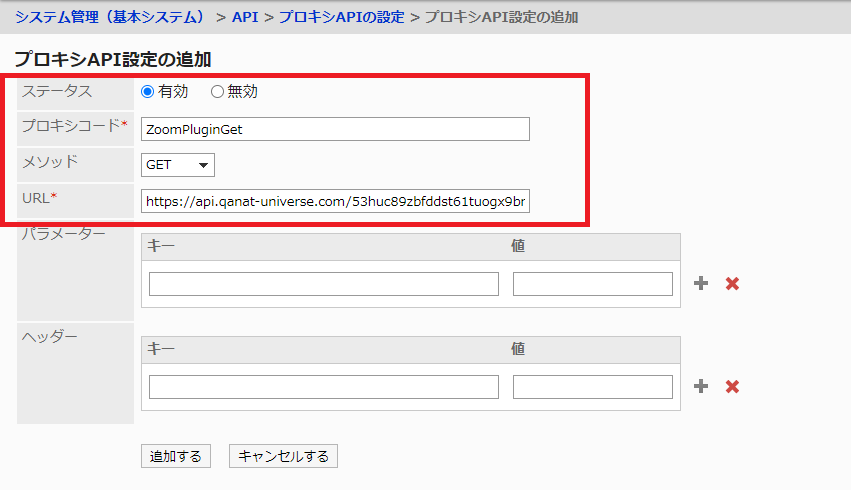
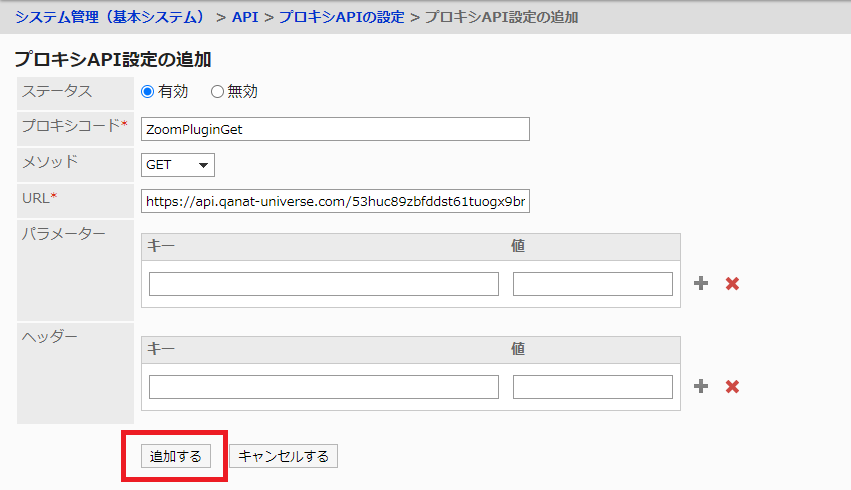
Confirm the settings and press [追加する].
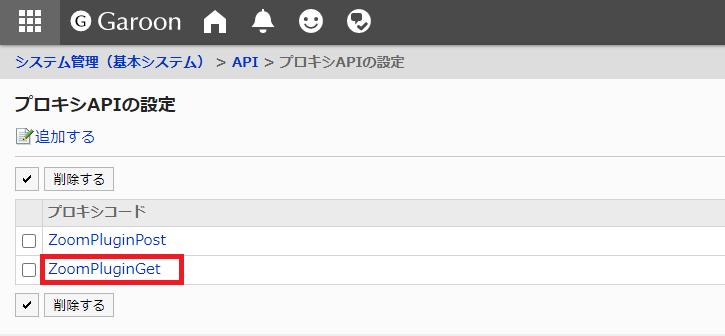
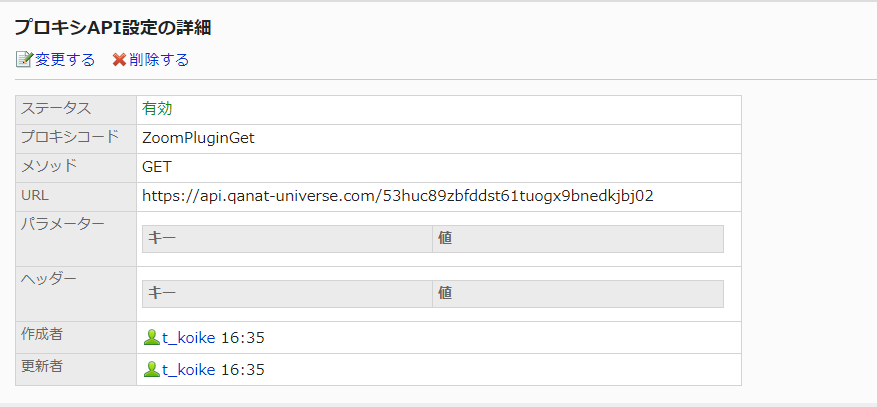
Click on the added [ZoomPluginGet] and confirm the contents.
 If it is registered correctly, it will look like the following.
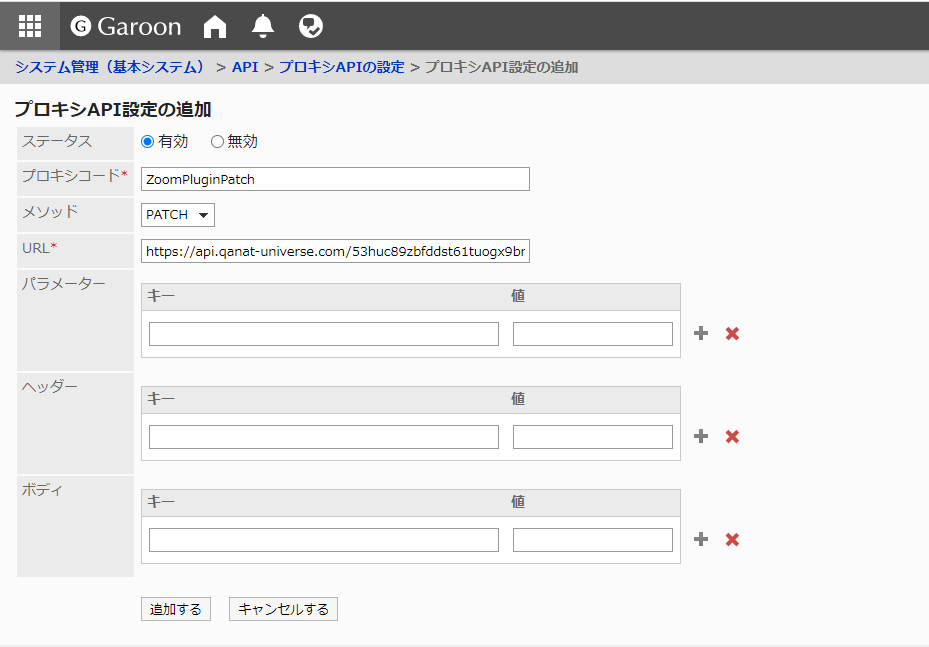
Add ZoomPluginPatch. On the [プロキシAPIの設定] screen, click [追加する] and enter the following information. - ステータス (set to [有効]) - プロキシコード (enter "ZoomPluginPatch") - メソッド (select "PATCH") - URL (enter "https://api.qanat-universe.com/53huc89zbfddst61tuogx9bnedkjbj02")

Confirm the settings and press [追加する].
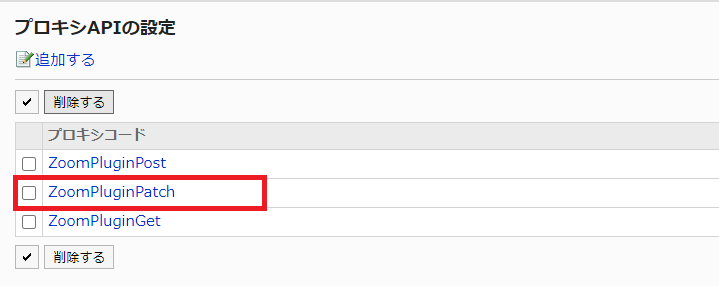
 Click on the added [ZoomPluginPatch] and confirm the contents.
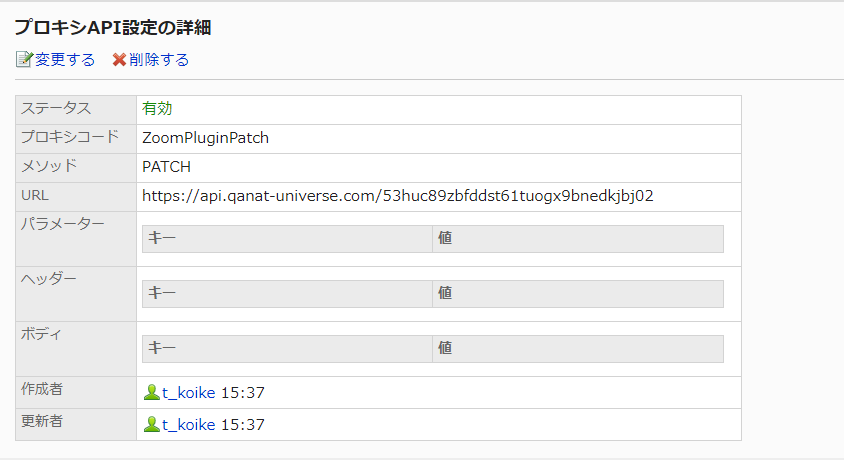
 If it is registered correctly, it will look like the following.
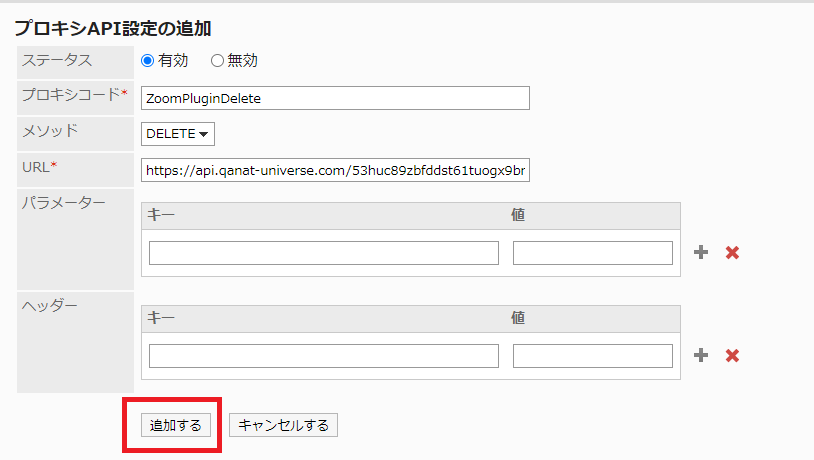
Add ZoomPluginDelete. On the [プロキシAPIの設定] screen, click [追加する] and enter the following information. - ステータス (set to [有効]) - プロキシコード (enter "ZoomPluginDelete") - メソッド (select "DELETE") - URL (enter "https://api.qanat-universe.com/53huc89zbfddst61tuogx9bnedkjbj02")
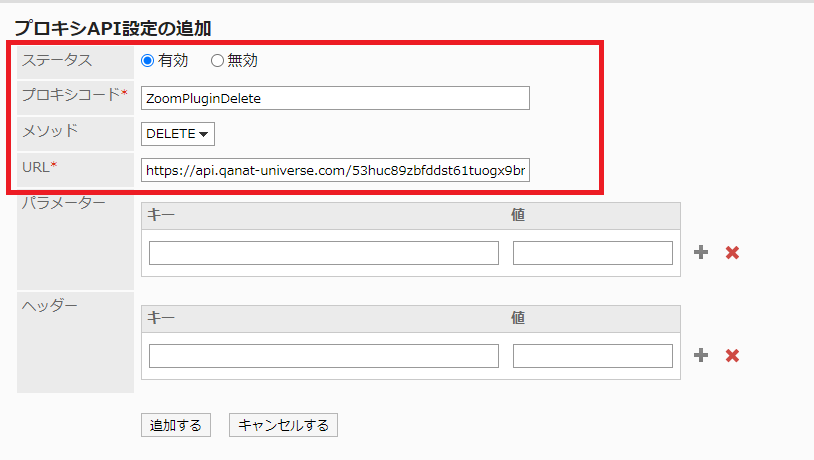
Confirm the settings and press [追加する].
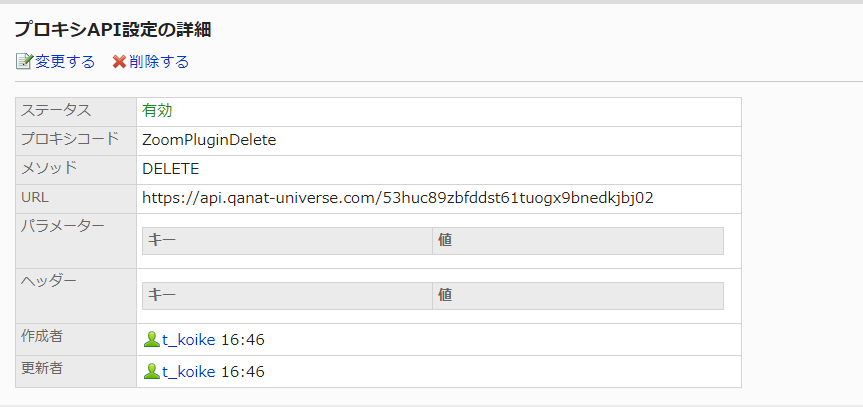
 Click on the added [ZoomPluginDelete] and confirm the contents.
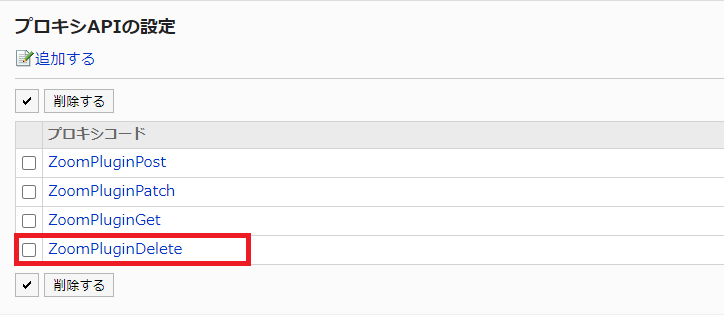 If it is registered correctly, it will look like the following.
2.1.4 Registering a Zoom facility
This product will start up in conjunction with a facility with a specific code registered in the facility settings of the schedule.Register the facility to which the linked facility code is applied so that the product can be used.
On the Garoon screen, Click on the gear icon and click [Garoonシステム管理].
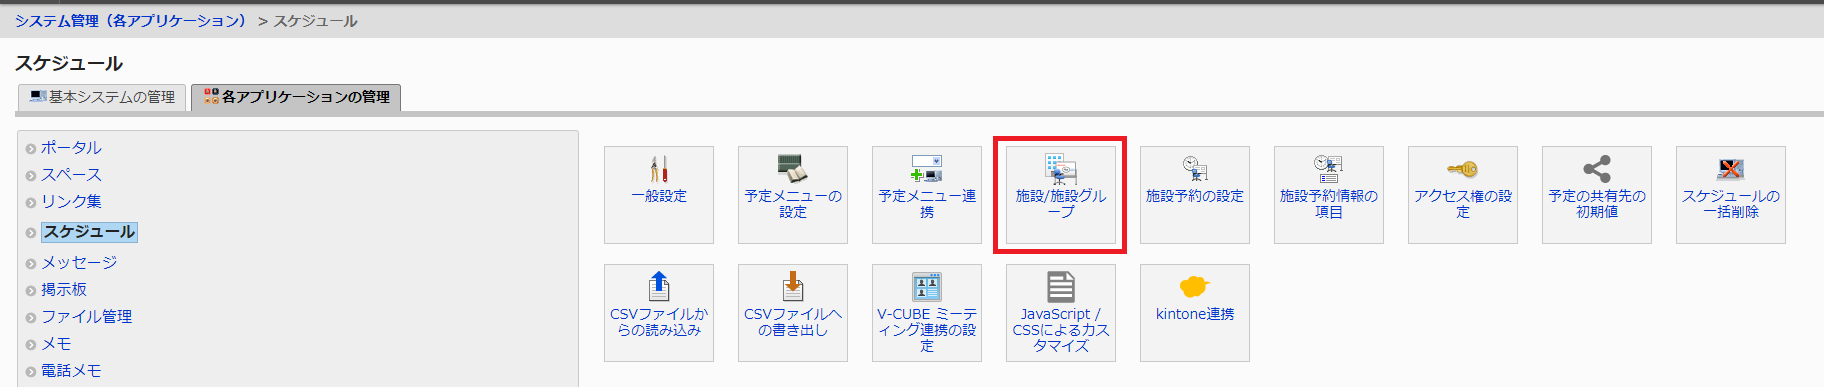
Click [スケジュール] on the System administration page.
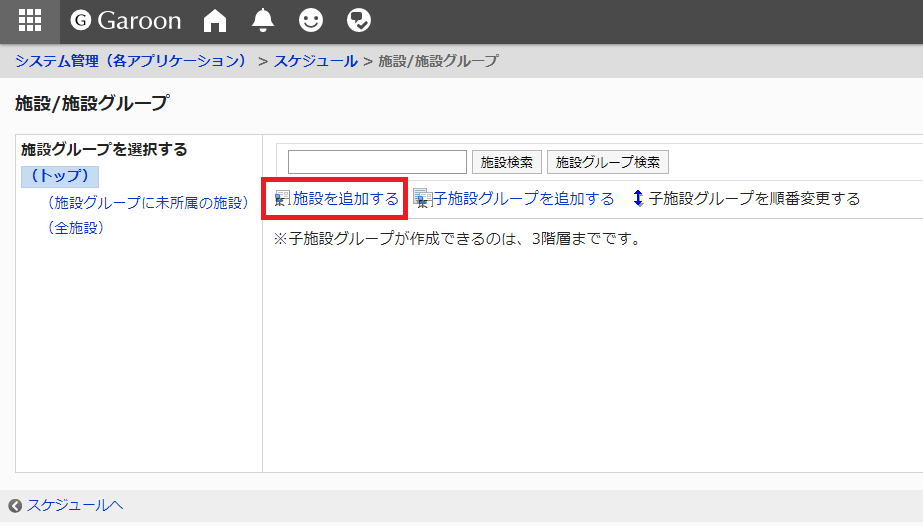
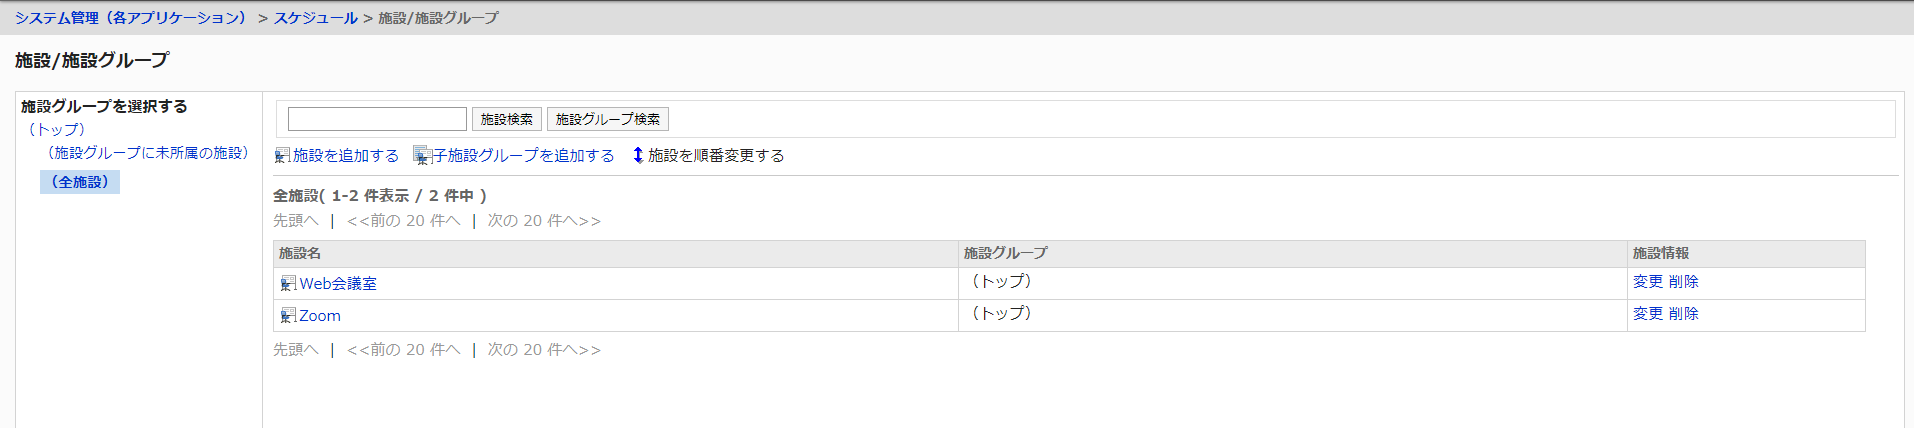
Press [Facility/Facility Group] from the schedule screen
From the Facility/Facility Group screen, press [Add Facility].
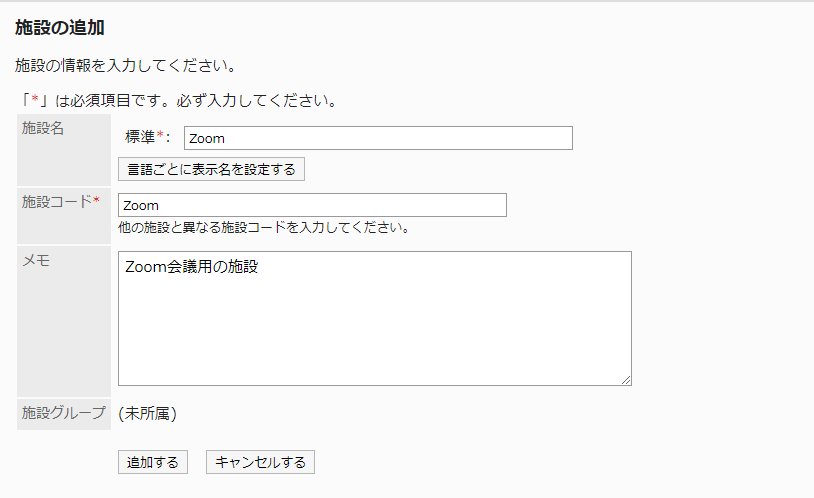
Set the following items in the Add Facility screen
- 施設名 (Enter any facility name)
- 施設コード (Enter the value set in [紐づける施設].)
- メモ (optional)
If the value is not set in [紐づける施設], it will not be linked. In this example, "Zoom" is used as the facility code.
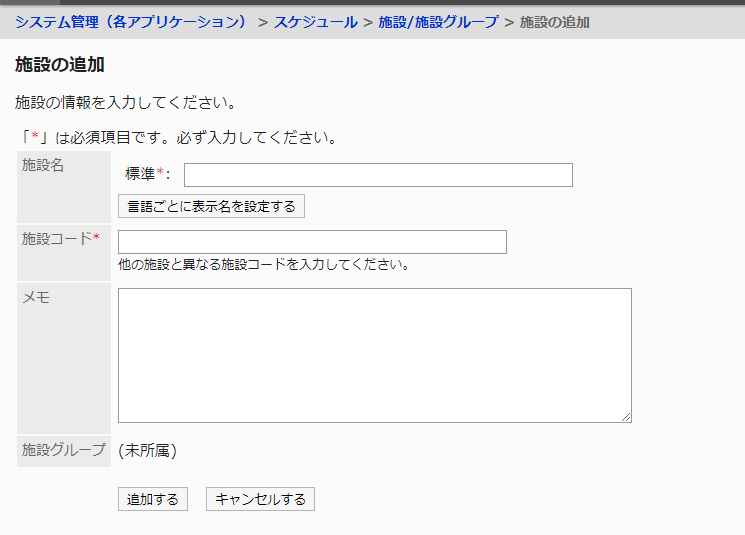
After completing each item, click [追加する].
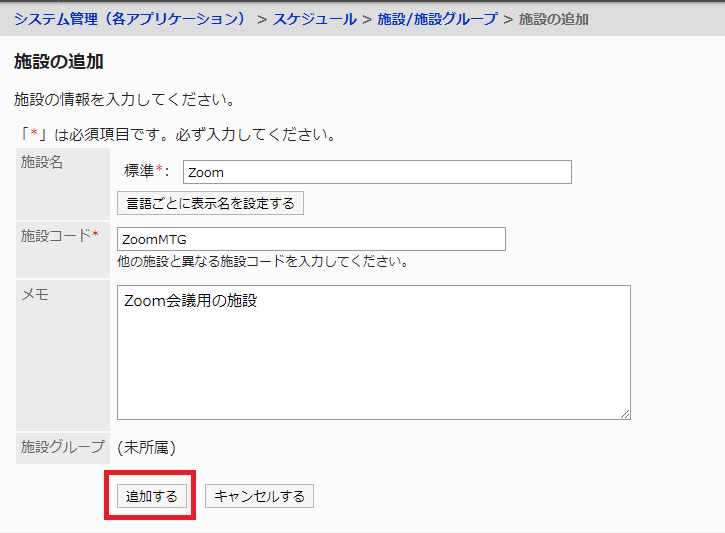
The facility for the Zoom conference will be added with the name of the facility you added.
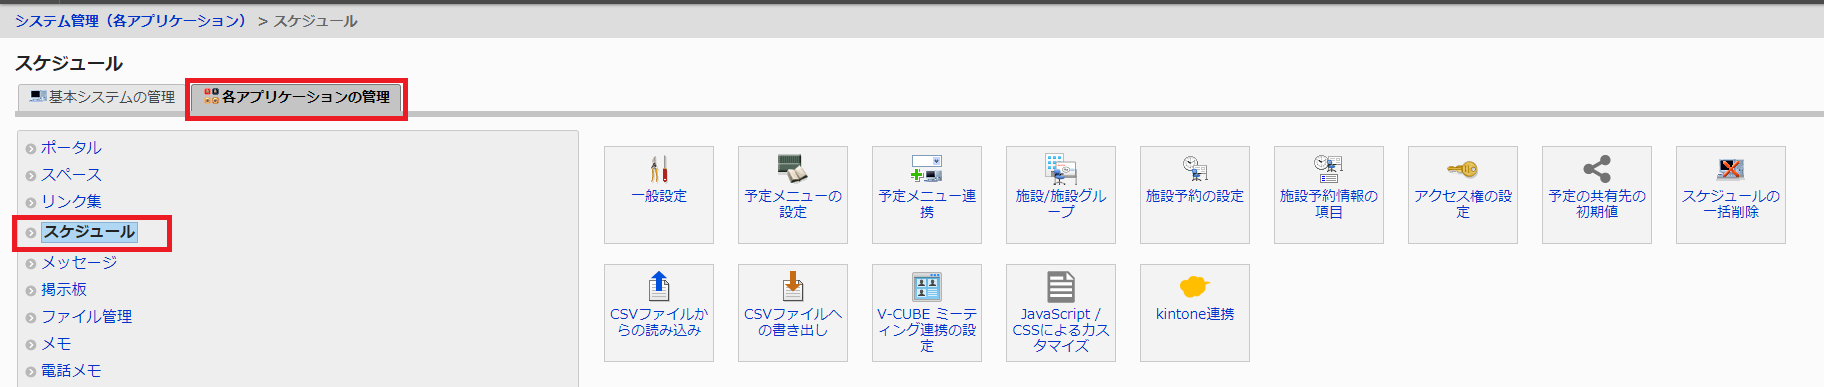
2.1.5 Apply "ATTAZoo G for Zoom" to Garoon
This is how to apply "ATTAZoo G for Zoom" to Garoon. After applying the software, configure the various settings to complete the integration between Garoon and Zoom. Once the integration is complete, you will be able to book Zoom meetings from Garoon. For instructions on how to use Zoom, please refer to the "ATTAZoo G for Zoom User's Manual".
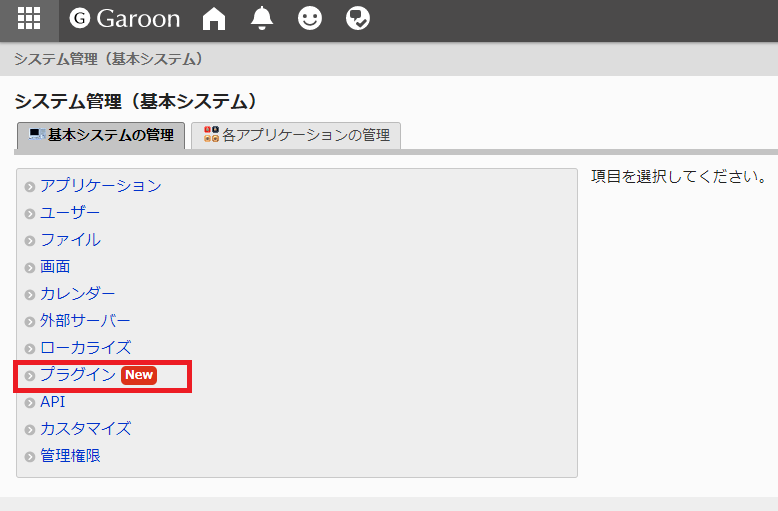
- On the Garoon screen, Click on the gear icon and click [Garoonシステム管理].
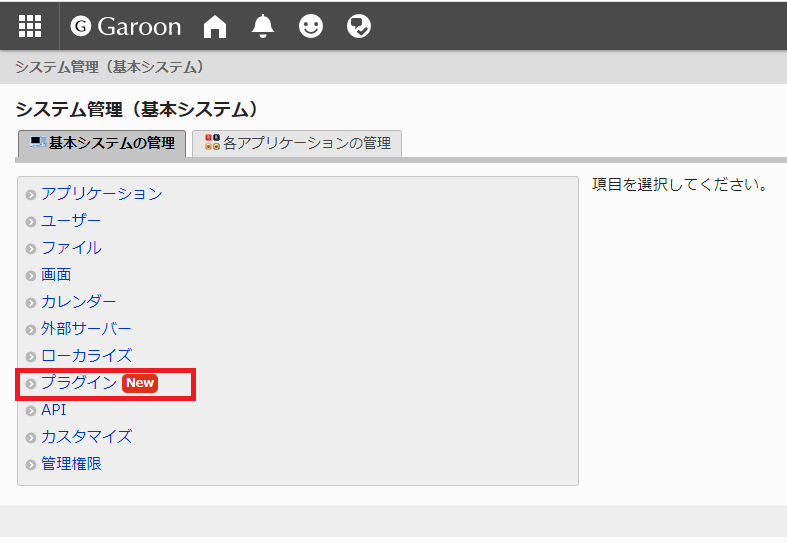
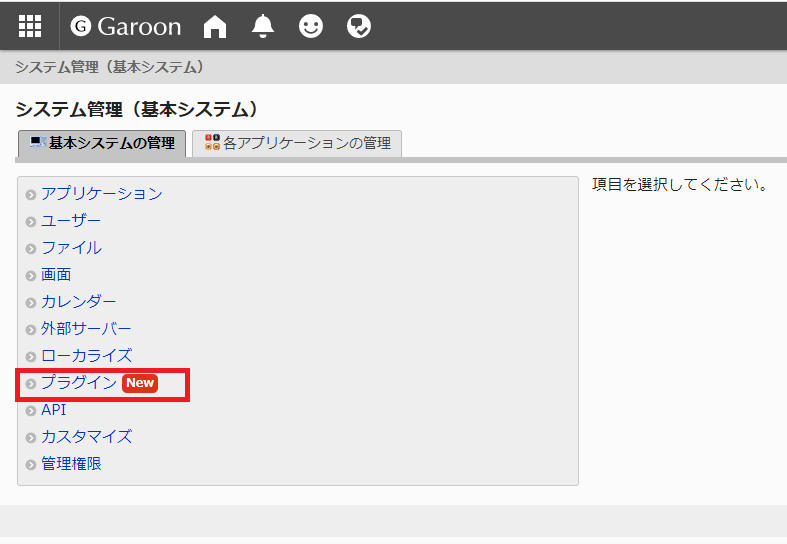
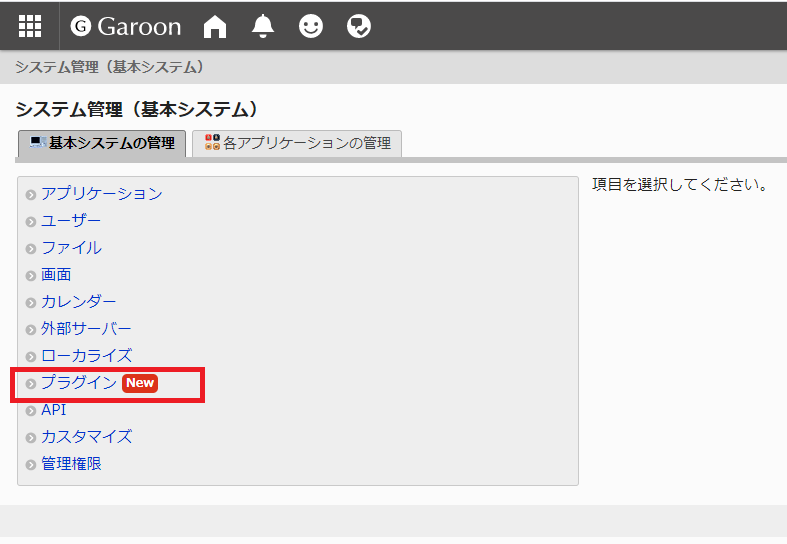
- Click [基本システムの管理] on the system administration screen, and then click [プラグイン].
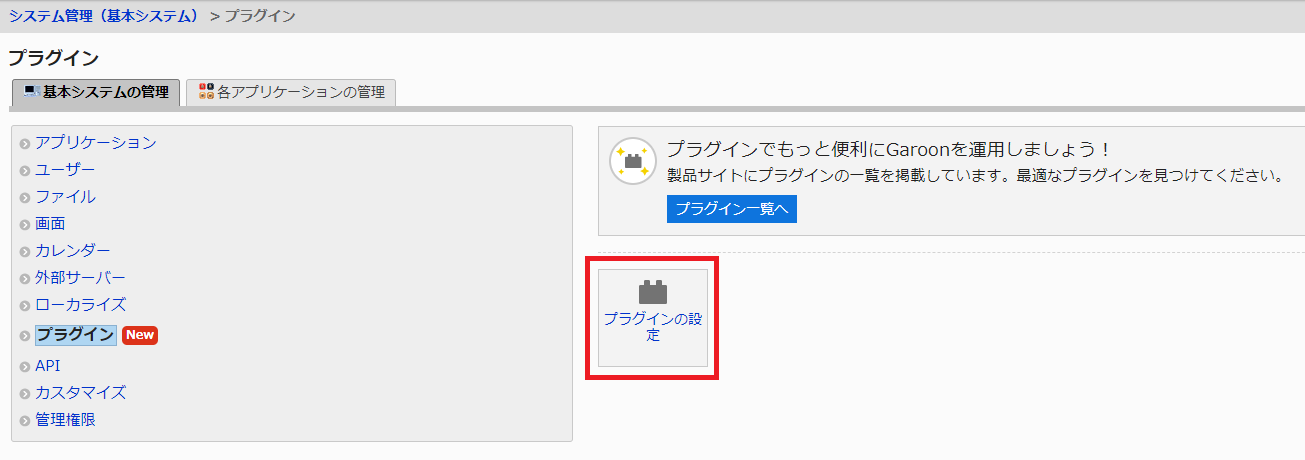
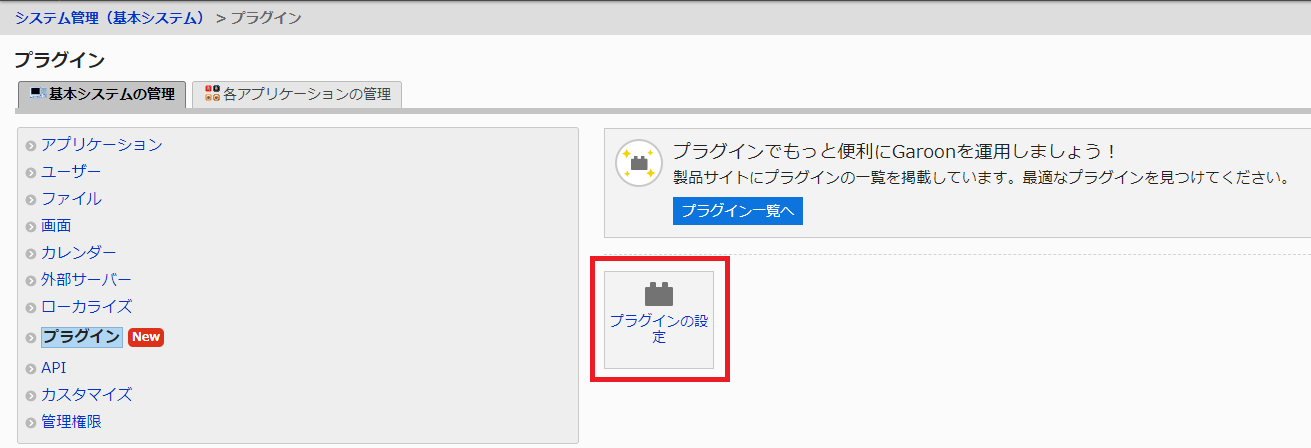
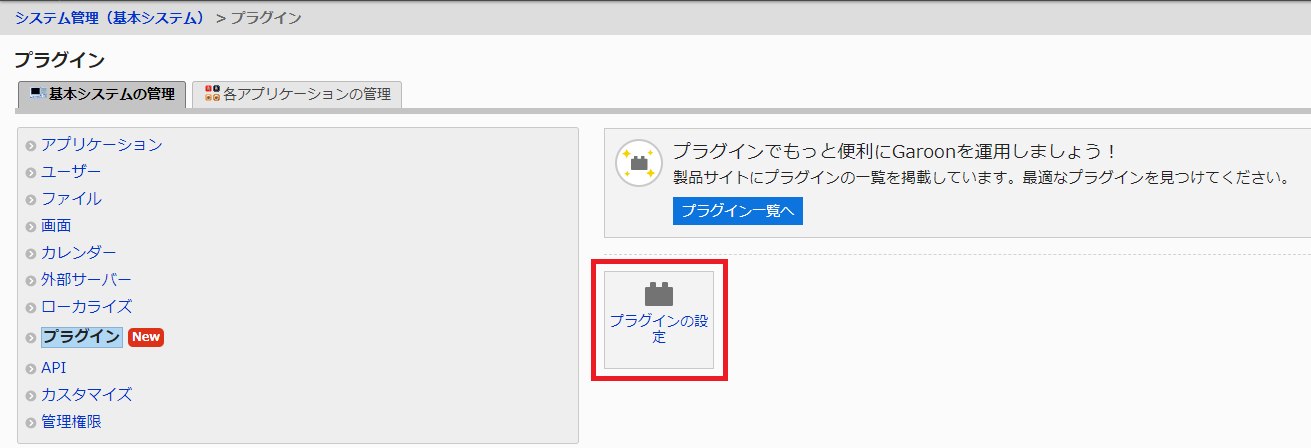
- From the Plug-in menu, click [プラグインの設定].
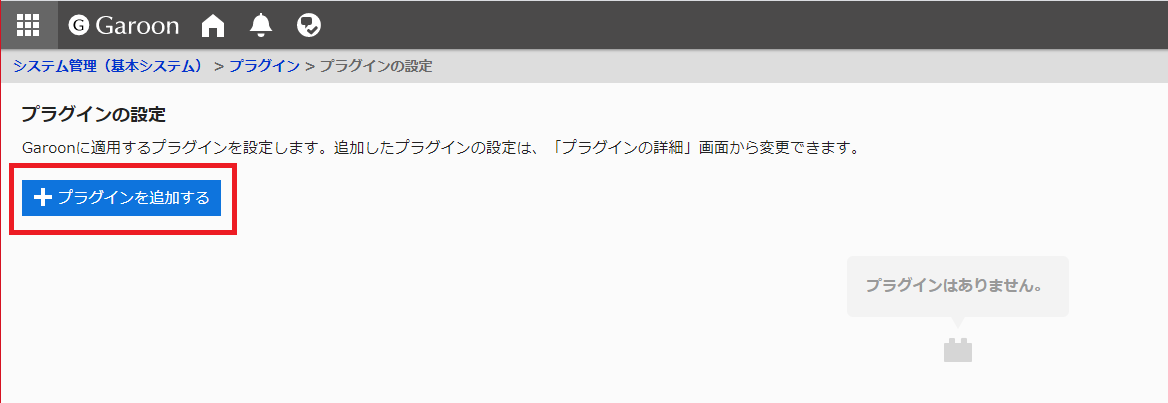
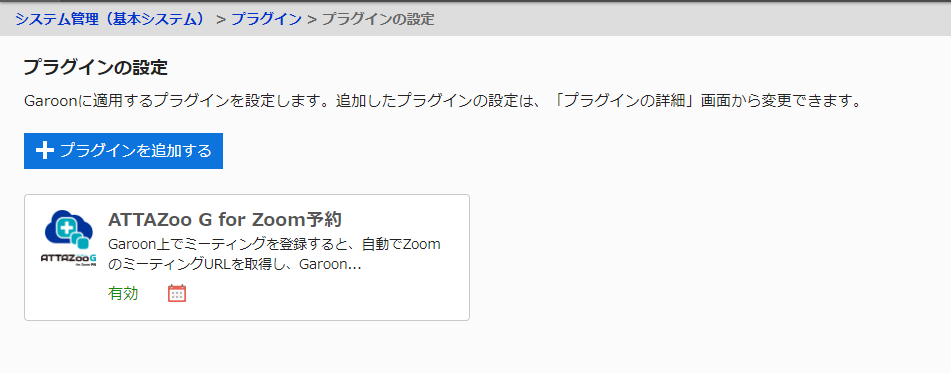
- From the plugin settings screen, click [プラグインを追加する].
- From the Add Plug-in screen, click [ファイルを添付], select [plugin.zip], and click [開く].
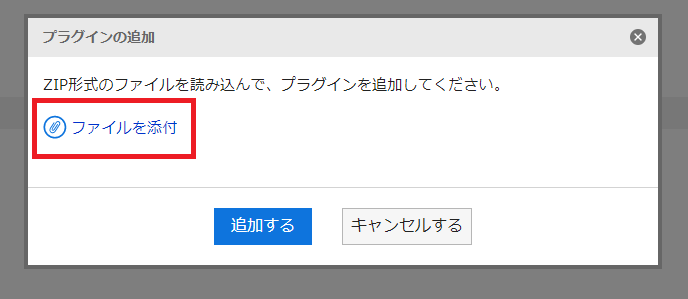
- Press [追加する] when the plugin.zip is loaded.
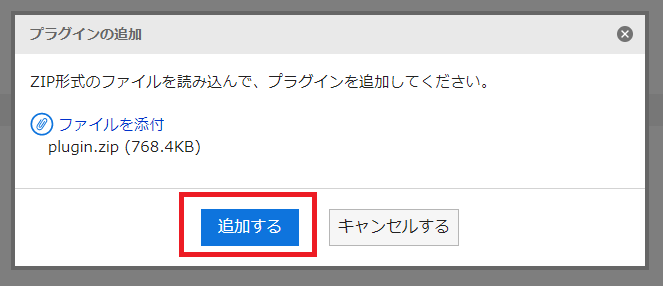
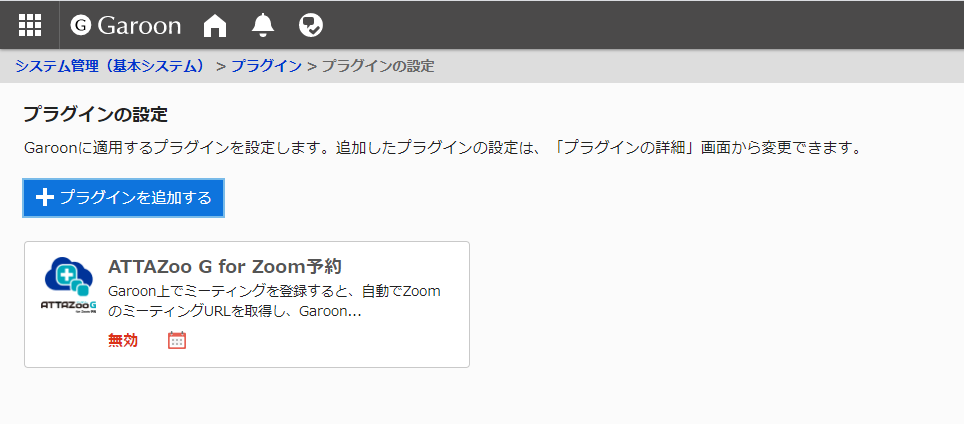
- "ATTAZoo G for Zoom" will be applied.

2.1.6 Activate This Product
This section describes the procedure for enabling this product. This product is disabled immediately after it is applied to Garoon, so you need to enable it. Please follow the steps below to enable this product.
- On the Garoon screen, Click on the gear icon and click [Garoonシステム管理].

- Click [基本システムの管理] on the system administration screen, and then click [プラグイン].

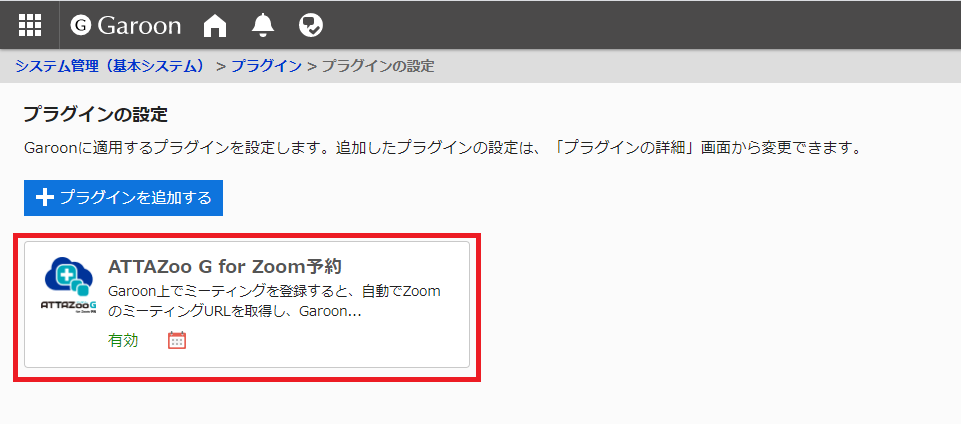
- From the Plug-in menu, click [プラグインの設定].

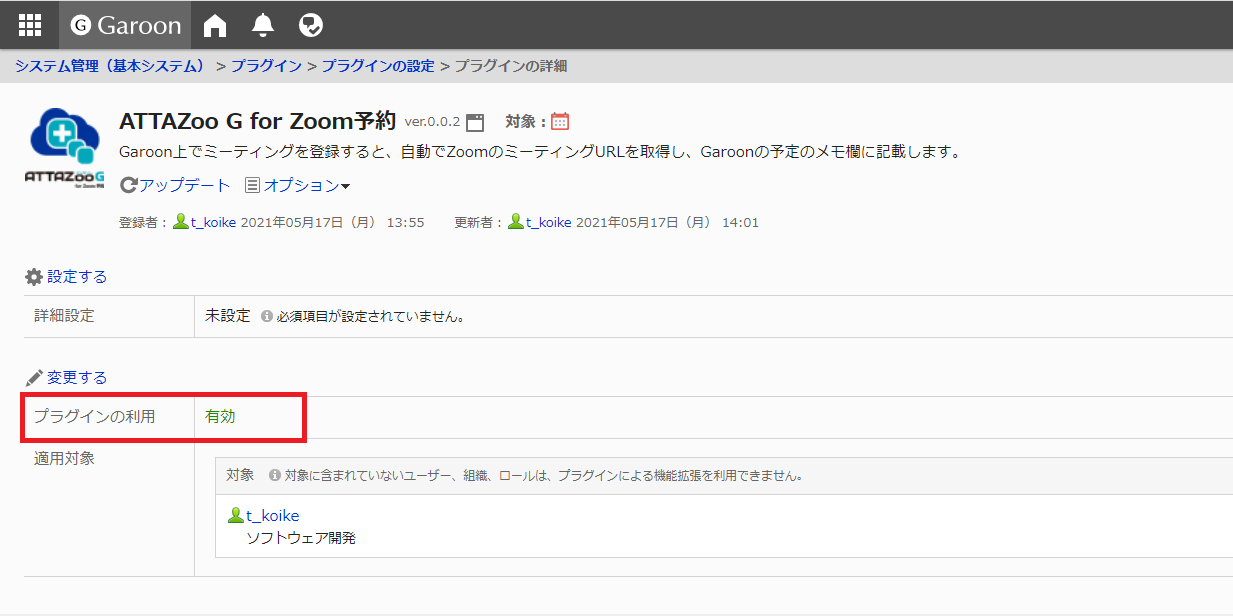
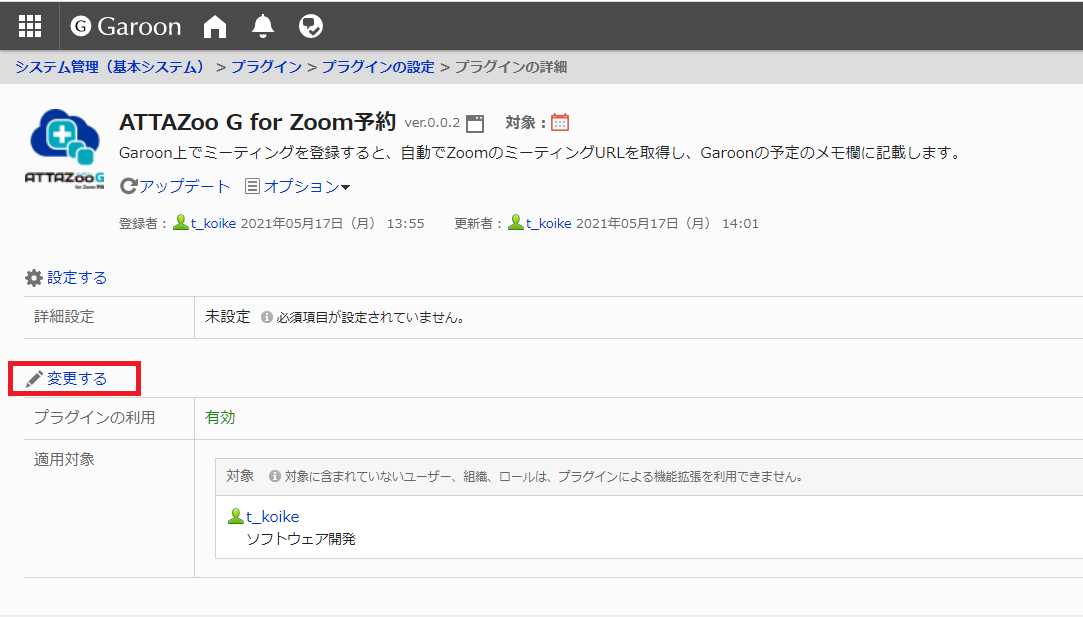
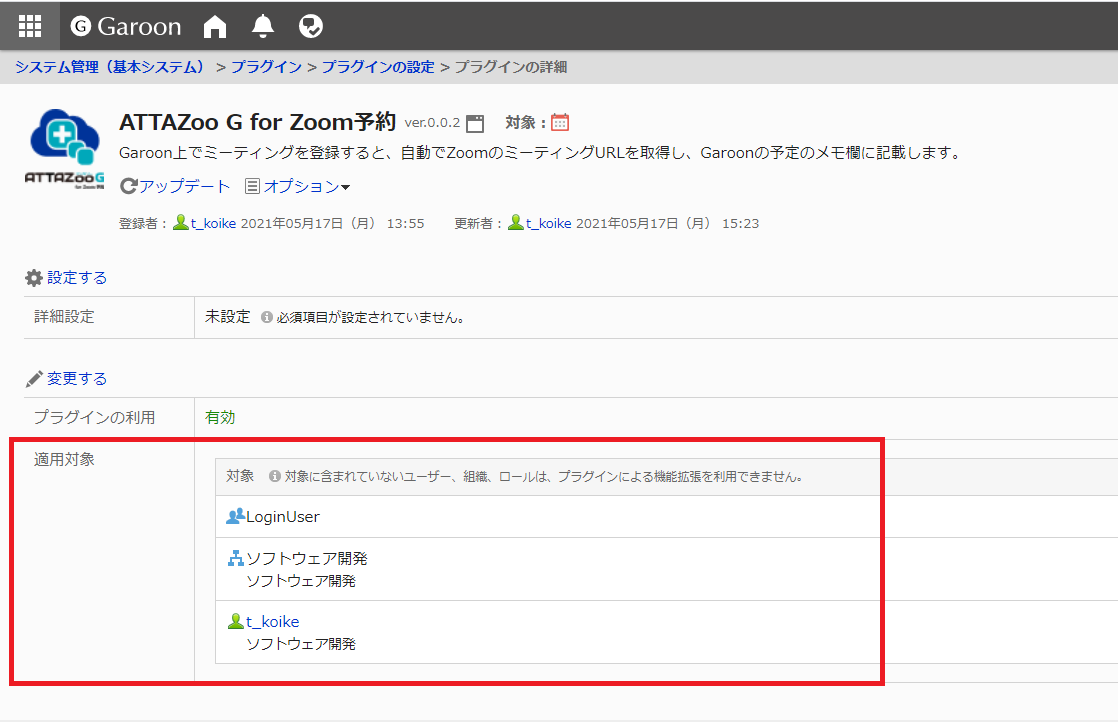
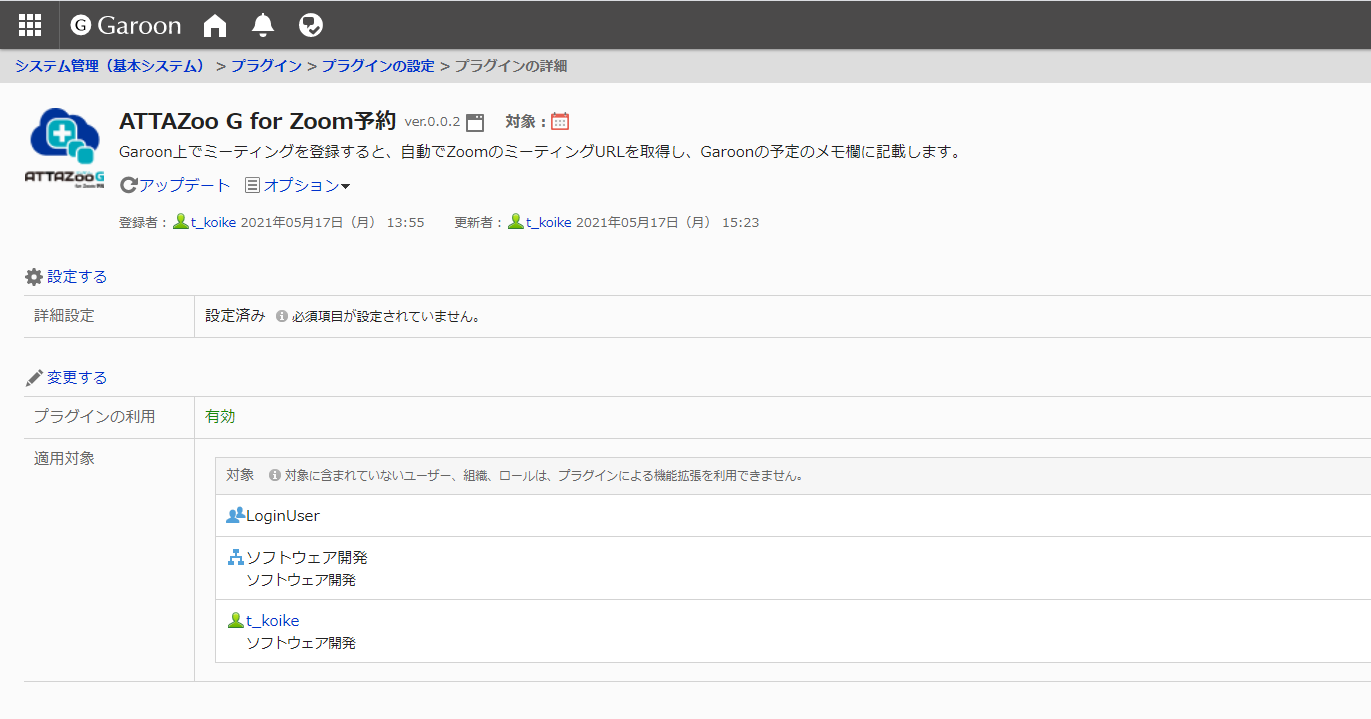
- Click [ATTAZoo G for Zoom] on the plugin settings screen.
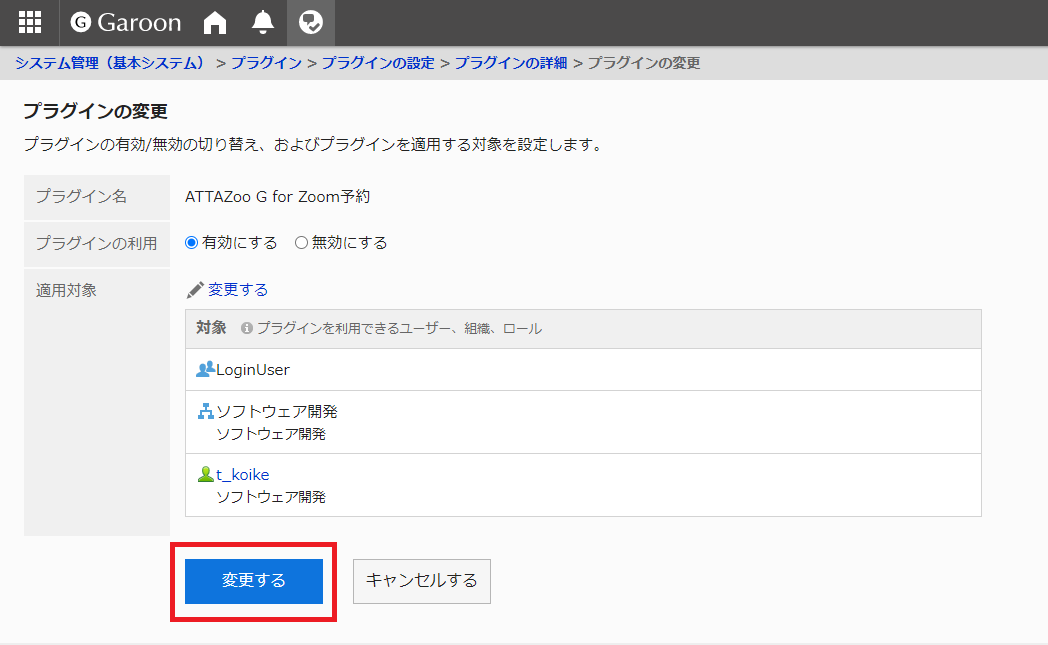
- Click [変更する] on [プラグインの利用] and [適用対象] in the plugin details screen.
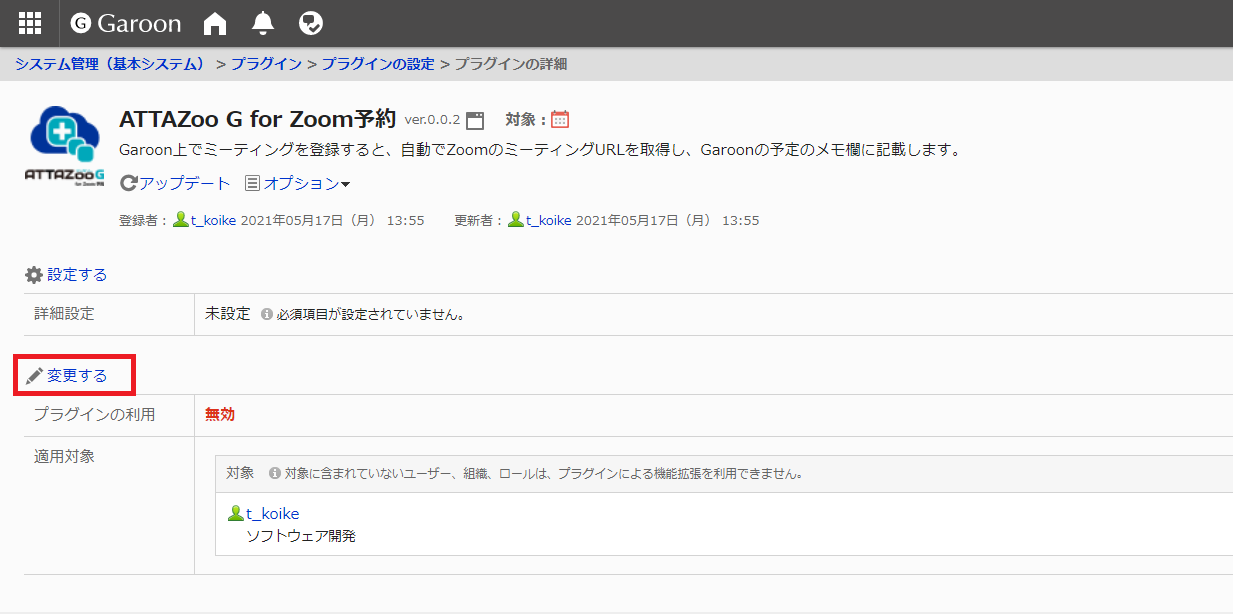
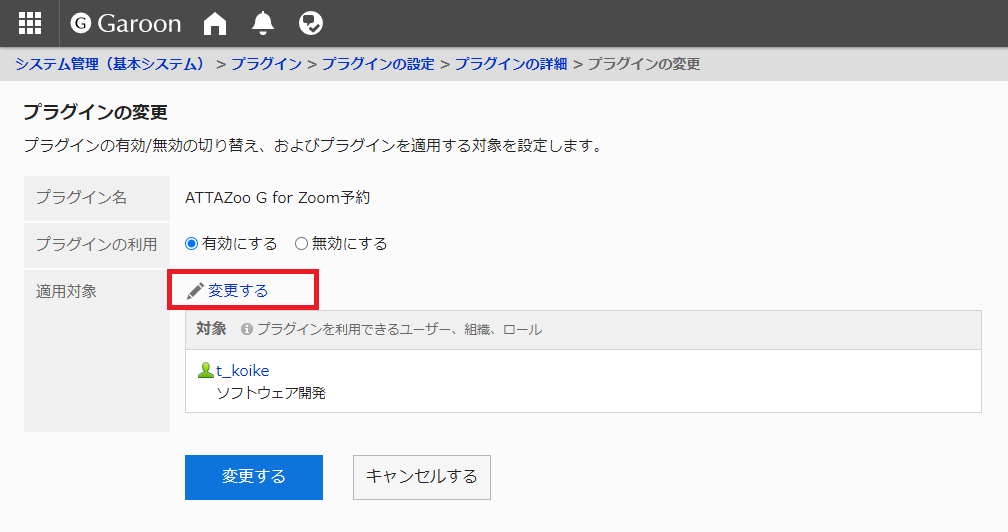
- Click [有効にする] under [プラグインの利用] on the Change Plug-in screen.
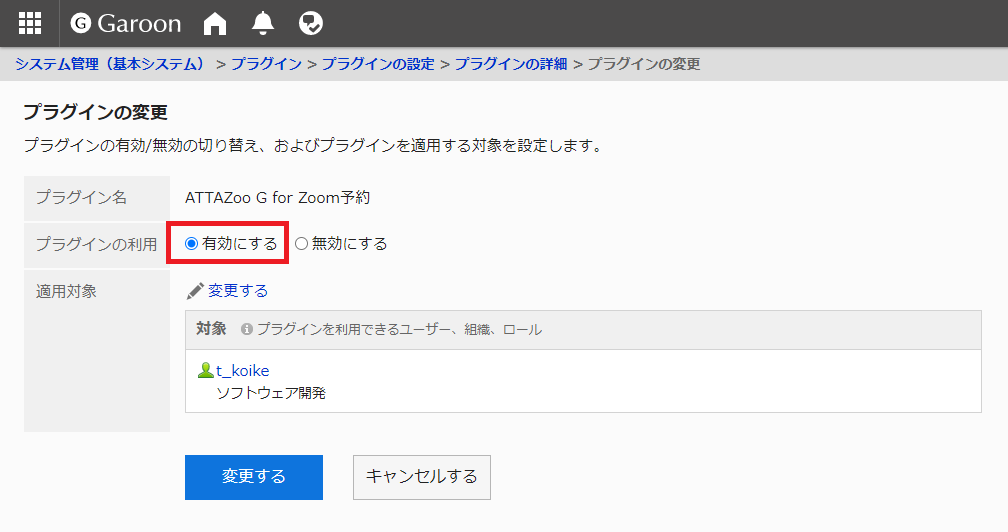
- After completing the change settings, press [変更する].
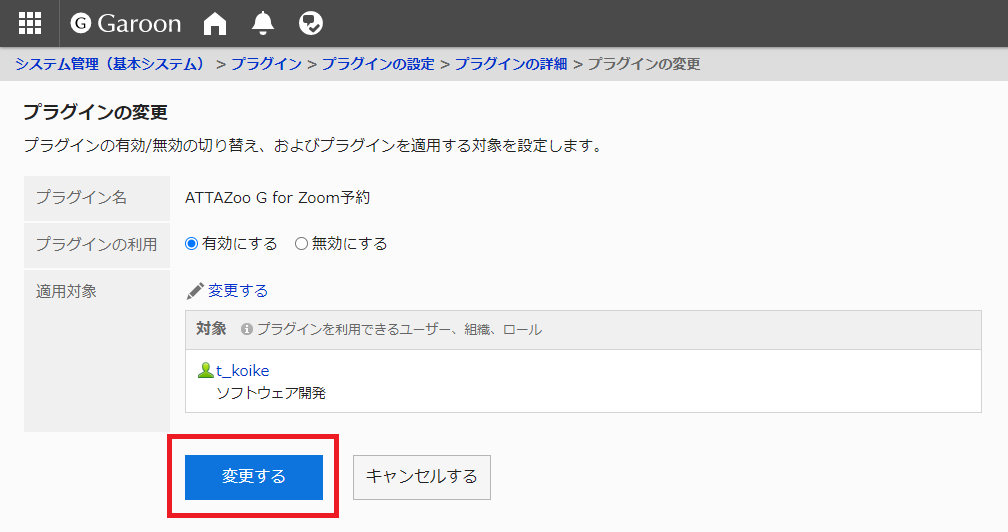
- The plugin will be configured with the changes you made.
The settings have been changed in the above screen.
2.1.7 User settings (Optional)
The range of users who can use this product can be changed at will.
On the Garoon screen, Click on the gear icon and click [Garoonシステム管理].
Click [基本システムの管理] on the system administration screen, and then click [プラグイン].
From the Plug-in menu, click [プラグインの設定].

Click [ATTAZoo G for Zoom] on the plugin settings screen.

Click [変更する] on [プラグインの利用] and [適用対象] in the plugin details screen.
In the Modify Plug-in screen, select [適用対象] and click [変更する].
Change the users and organizations that can use the plugin
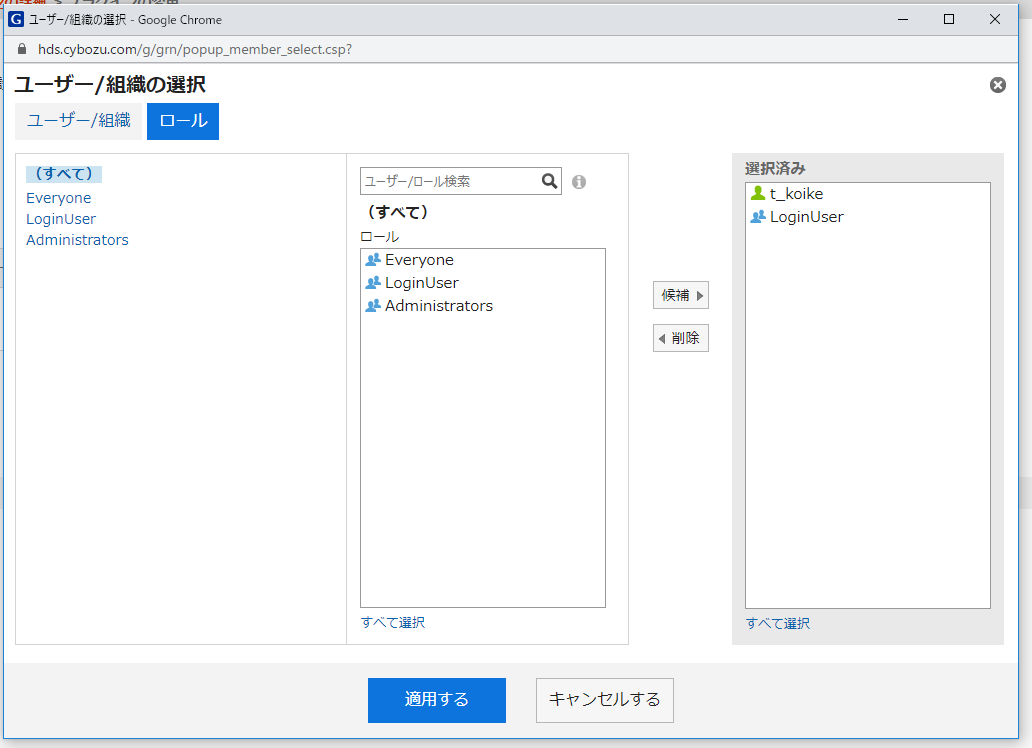
To add users and organizations
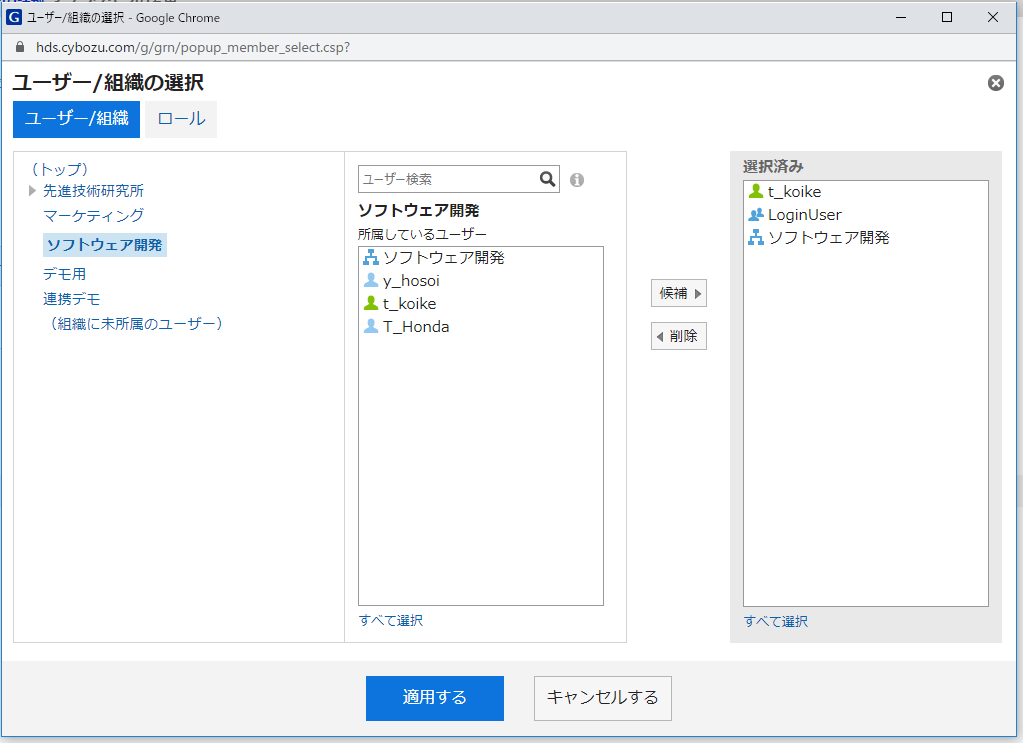
- Select the users and organizations you want to add from [ユーザー/組織] or[ロール], and then click [候補] to add them to [選択済み].
To delete a user or organization
- Select the user or organization you want to delete from the [選択済み] list, and click [削除] to delete it.
After changing the settings, click [適用する].

Press [変更する] on the plugin change screen
The plugin will be configured with the changes you made.
2.1.8 Applying the License Key
This product will operate as a paid version when the license key has been applied. If the license key has not been applied, the product will run as a free version. The number of Zoom accounts that can be registered depends on each subscription plan. If you have multiple Zoom licenses, you can register multiple Zoom accounts with one Zoom account. When running as a paid version, the Zoom account that can be registered will be the account that holds the license.
| plan | Number of Zoom accounts that can be registered | Notes |
|---|---|---|
| Free edition | 1 | Only free Zoom accounts can be linked. |
| Standard edition | 10 | Only paid Zoom accounts can be linked. |
| Advanced edition | 20 | Only paid Zoom accounts can be linked. |
| Professional edition | 50 | Only paid Zoom accounts can be linked. |
Example: For Standard Zoom account A - Number of Zoom licenses you have 1 Zoom account B - Number of Zoom licenses you have 10
Combinations that can be registered within the range of 10 standard registrable numbers Combination 1 (A×1) Combination 2 (A×1, B×9) Combination 3 (B×10) .... .etc It is possible to register Zoom accounts within the range of the number of possible registrations.
In the above example, the following combinations cannot be registered. NG1 (A×1, B×10)・You cannot register more than the maximum number of accounts. NG2 (Zoom free account): Free accounts cannot be registered in Standard.
The procedure for applying a license key is described below.
On the Garoon screen, Click on the gear icon and click [Garoonシステム管理].

Click [基本システムの管理] on the system administration screen, and then click [プラグイン].
From the Plug-in menu, click [プラグインの設定].
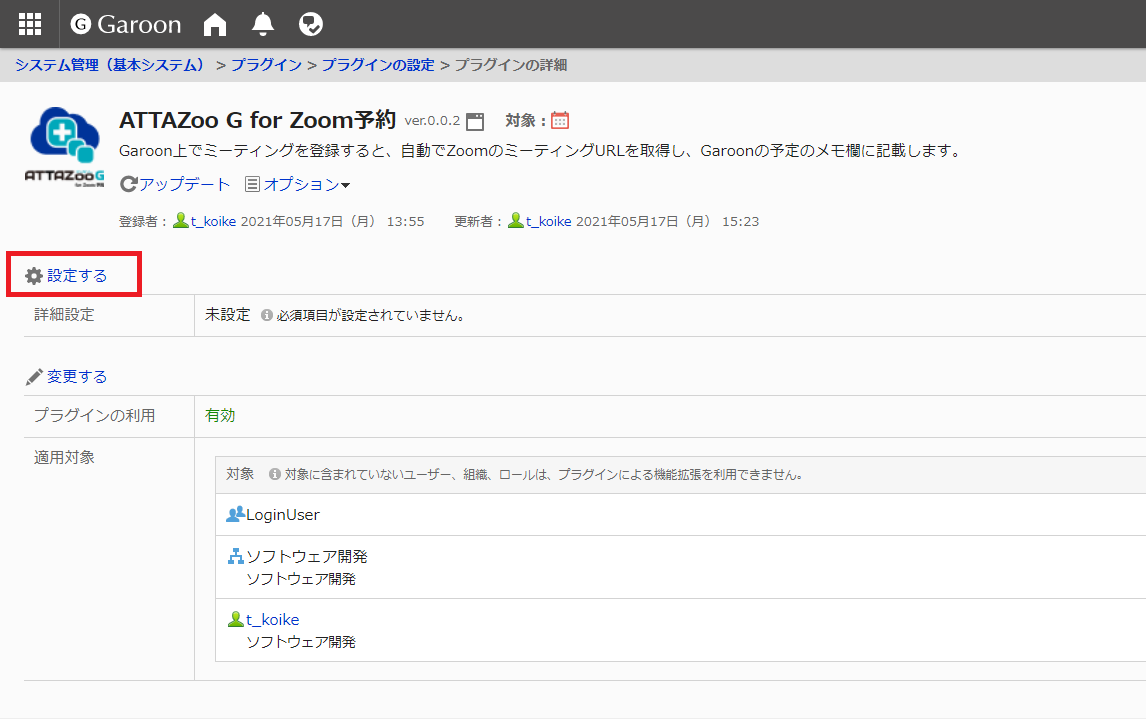
Click [ATTAZoo G for Zoom] on the plugin settings screen.
Click [設定する] on [詳細設定] in the plugin details screen
Enter the license key in the license key entry field.
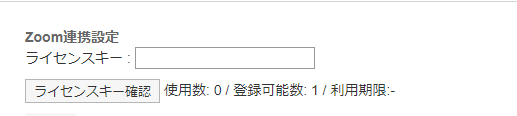
Press[ライセンスキー確認]
「ライセンスチェック中」screen will appear and close when the authentication is complete.
If the authentication is successful, the number of available registrations and the expiration date values will be updated.

2.1.9 Applying for a linked Zoom account
This section explains how to apply a Zoom account to be linked. Only one Zoom account can be linked per Garoon environment. In the following steps, we will assume that the Zoom account to be linked with this product is already prepared.
Caution If you want it to work with Internet Explore, you need to add the following URL to the Trusted Sites in the Security tab of the Internet Options in the Internet Explore settings. https://zoom.us/oauth/authorize
This product is authenticated by Zoom's "ATTAZoo G for Zoom" application, and the Zoom account to be linked is set. In the following steps, we will assume that the Zoom account to be linked with this product is already prepared. Oauth authentication is required to add an account, but if you have already authenticated once, steps 7 and 8 will be skipped when you authenticate again.
If you want to add a different account than the one you have already added, you will need to go to Zoom's My Page, log out, and perform Oauth authentication.
On the Garoon screen, Click on the gear icon and click [Garoonシステム管理].

Click [基本システムの管理] on the system administration screen, and then click [API].

From the Plug-in menu, click [プラグインの設定].

Click [ATTAZoo G for Zoom] in the plugin settings screen.

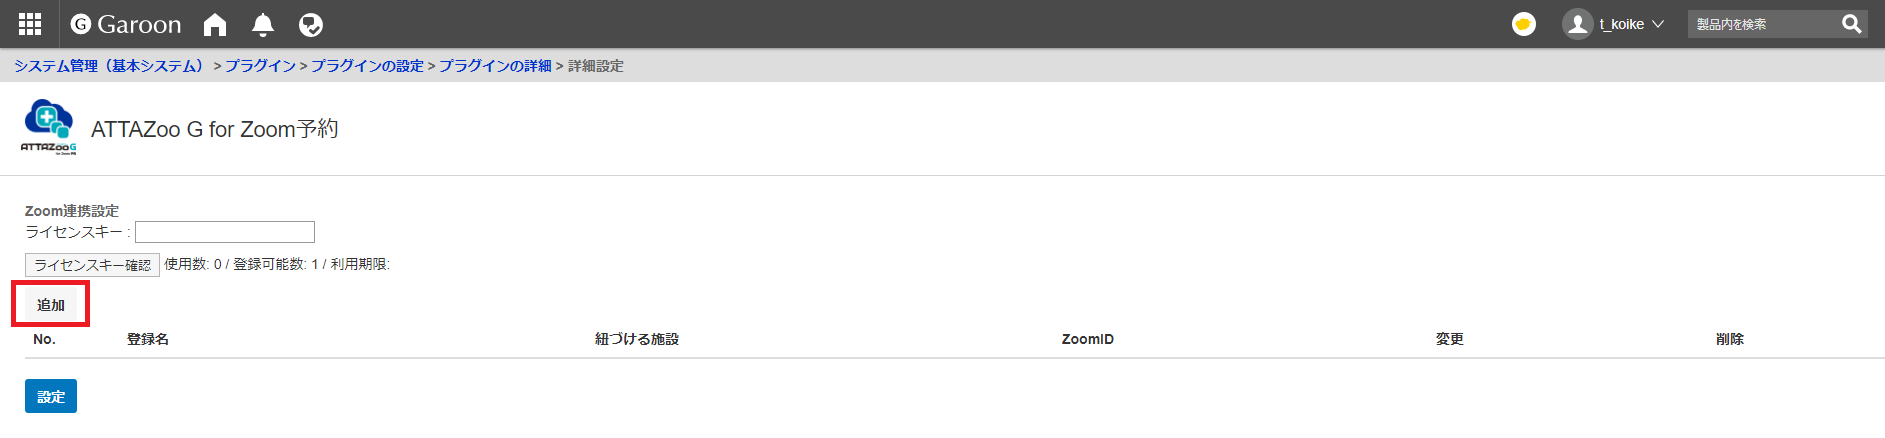
Click [設定する] on [詳細設定] in the plugin details screen

Press [追加]
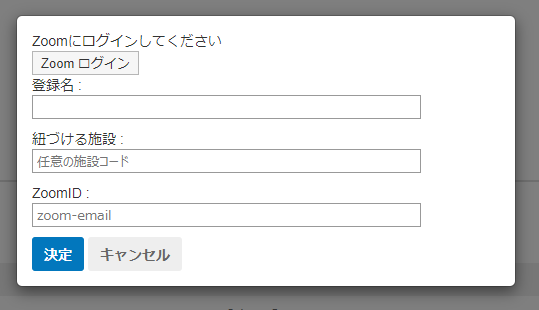
The Add Account screen will appear.
Press[Zoom ログイン]
The authentication screen for your Zoom account will appear in a separate tab of your browser.
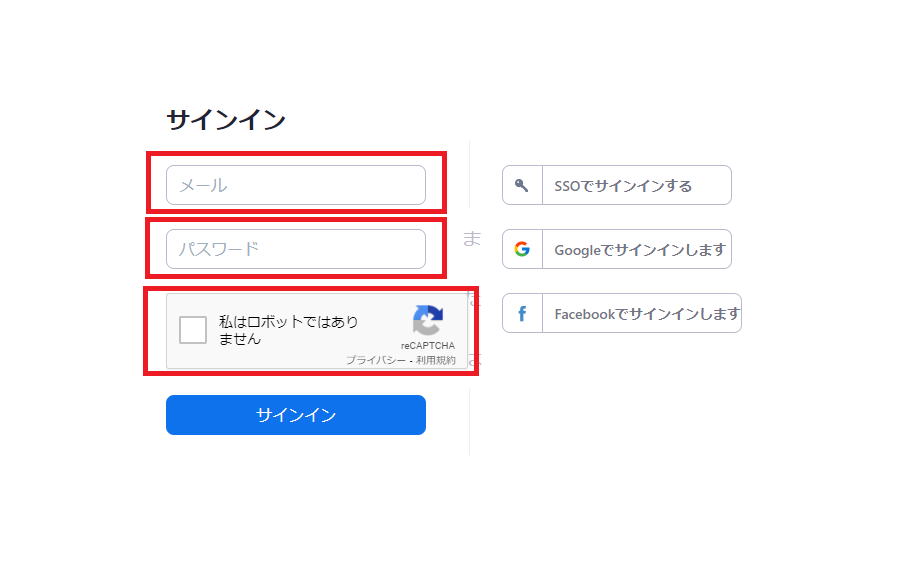
Perform Oauth authentication Enter the following Email: Enter the email address that is registered in your Zoom account. Password: Enter the password that is registered in your Zoom account. Caution.
If you have already activated your license key, you can only register for a paid Zoom account. If you have not yet activated your license key, you can only register for a free Zoom account. Paid Zoom account = Account with a Zoom license Free Zoom account = Account without a Zoom license
Check the "I am not a robot" checkbox. After entering the above information, press [Sign In].
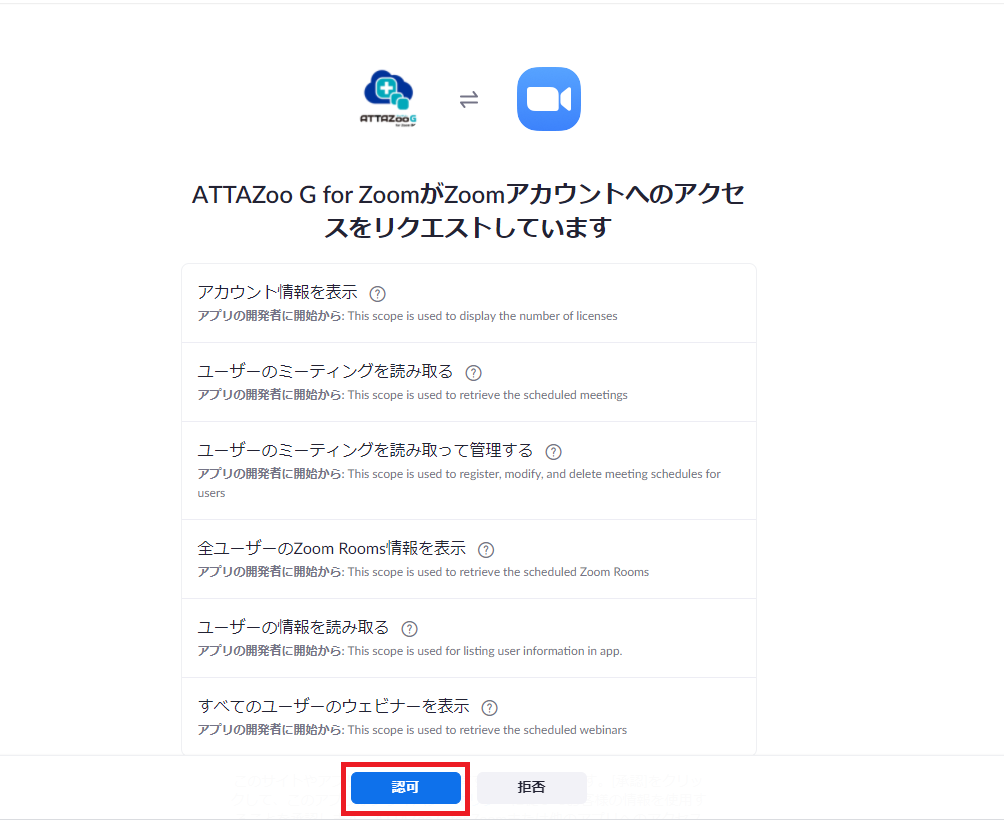
Authenticate the Attazoo G for Zoom application
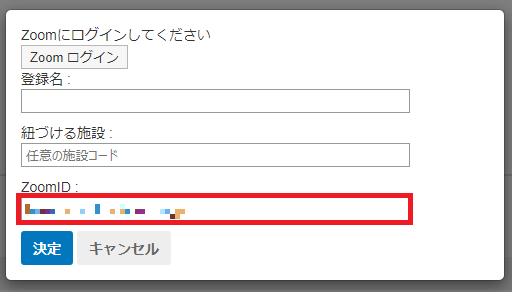
If this is the first time you have logged in with the Zoom account you are trying to register, press [サインイン] and the request screen for the Zoom application "ATTAZoo G for Zoom" will appear. Authorize the app to access your Zoom account. Confirm the contents and press [認可]. When you press [認可], the tab of the Zoom Authorization screen will be closed, and the ZoomID of the account you have authorized will be automatically entered in the Zoom ID field of the Add Account screen in the plugin screen. Caution If you want to register other additional Zoom accounts, you will need to sign out from Zoom My Page.
Enter the [登録名]. Enter a name of your choice for the configuration information.
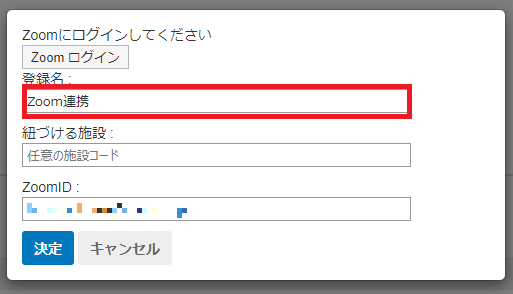
Enter the [紐づける施設]. This product will start up in conjunction with a facility with a specific code registered in the facility settings of the schedule. To link this product with Garoon, you can set a facility code with any name. Enter the name of the facility code you want to set in the [紐づける施設] field.

Press [決定] The account you have set up will be registered.
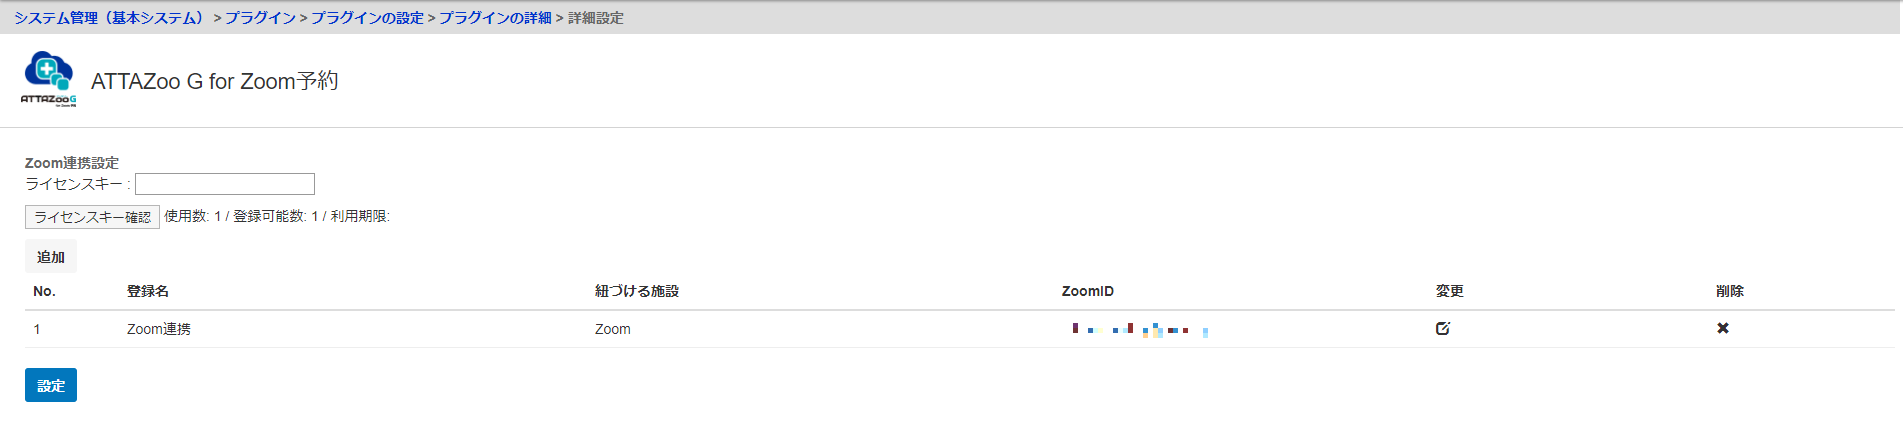
After completing the input, press [設定].
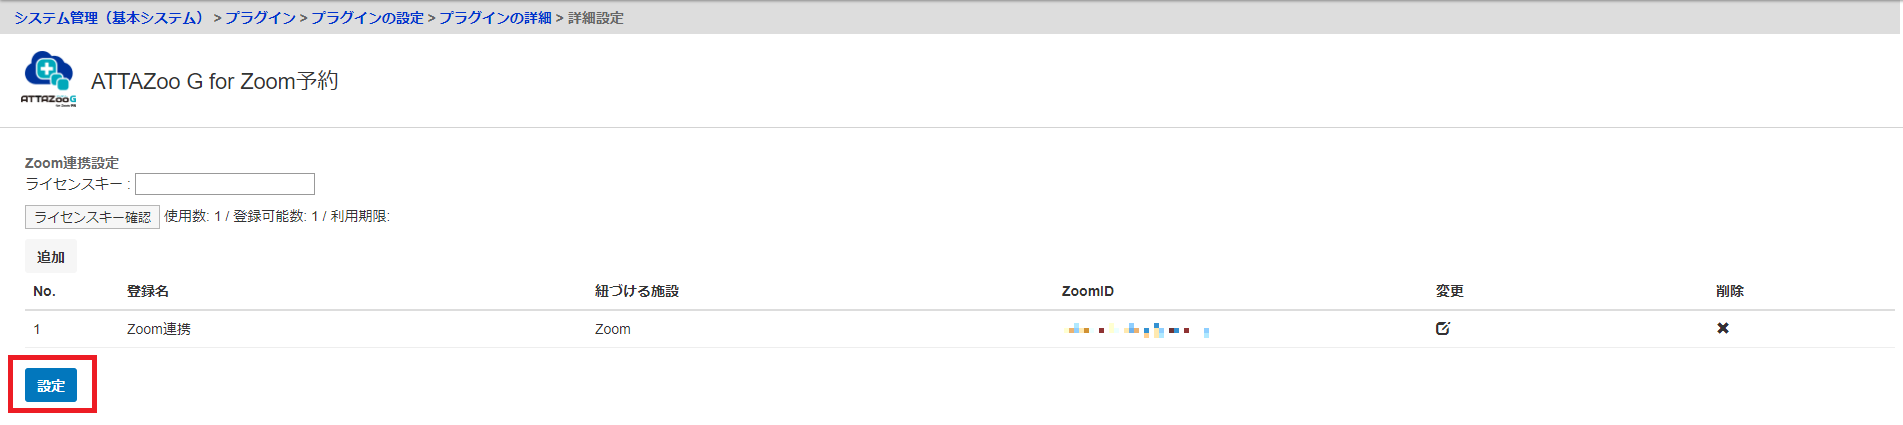
If you return to the following screen, your settings are complete.
This completes the installation of "ATTAZoo G for Zoom".
2.2 Removing this product
This section describes how to remove this product from Garoon. Please note that once the settings are deleted, they cannot be restored, so please use your own judgment.
2.2.1 How to remove this product
On the Garoon screen, Click on the gear icon and click [Garoonシステム管理].

Click [基本システムの管理] on the system administration screen, and then click [API].
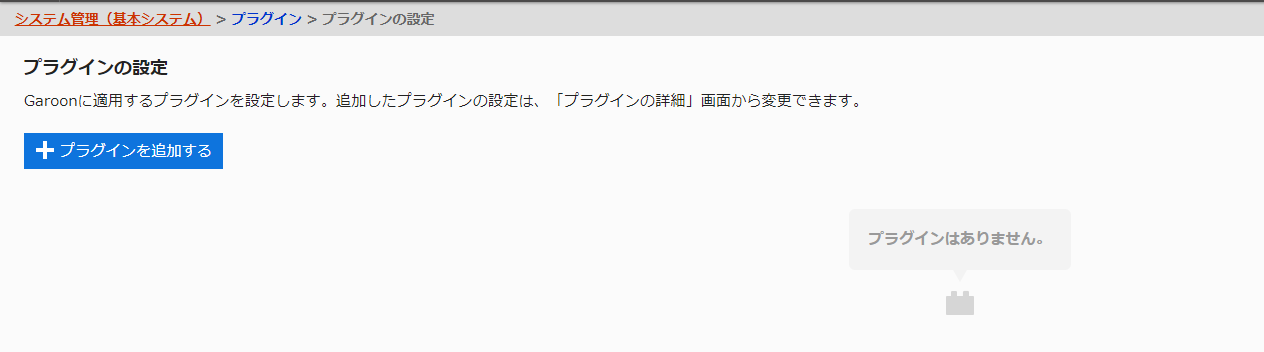
From the Plug-in menu, click [プラグインの設定].
Click [ATTAZoo G for Zoom] in the plugin settings screen.
Press [オプション] on the plugin details screen, and then press [削除する].
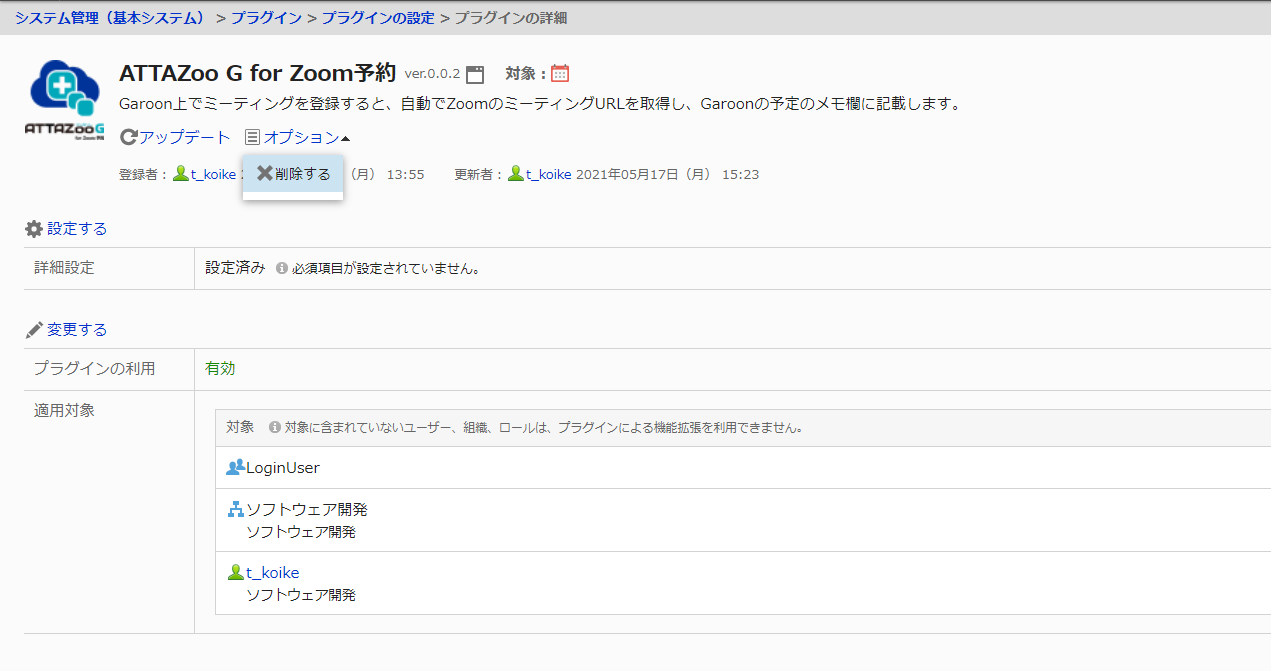
You will see a message warning you to remove the plug-in. Press [プラグインを削除する].
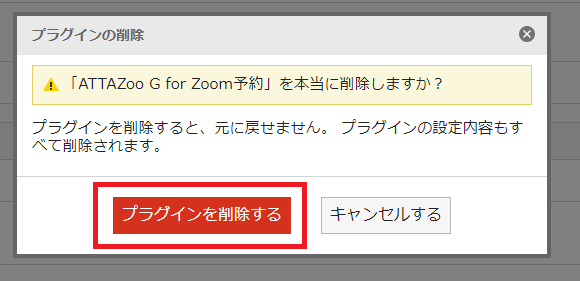
The [ATTAZoo G for Zoom] plugin will be removed.
Please refer to the following for deleting the proxy API configured at the time of installation. https://jp.cybozu.help/g/ja/admin/system/api/proxyapi.html#admin_system_api_proxyapi_04
2.2.2 Uninstalling the ATTAZoo G for Zoom Add-on
- Login to your Zoom Account and navigate to the Zoom App Marketplace.
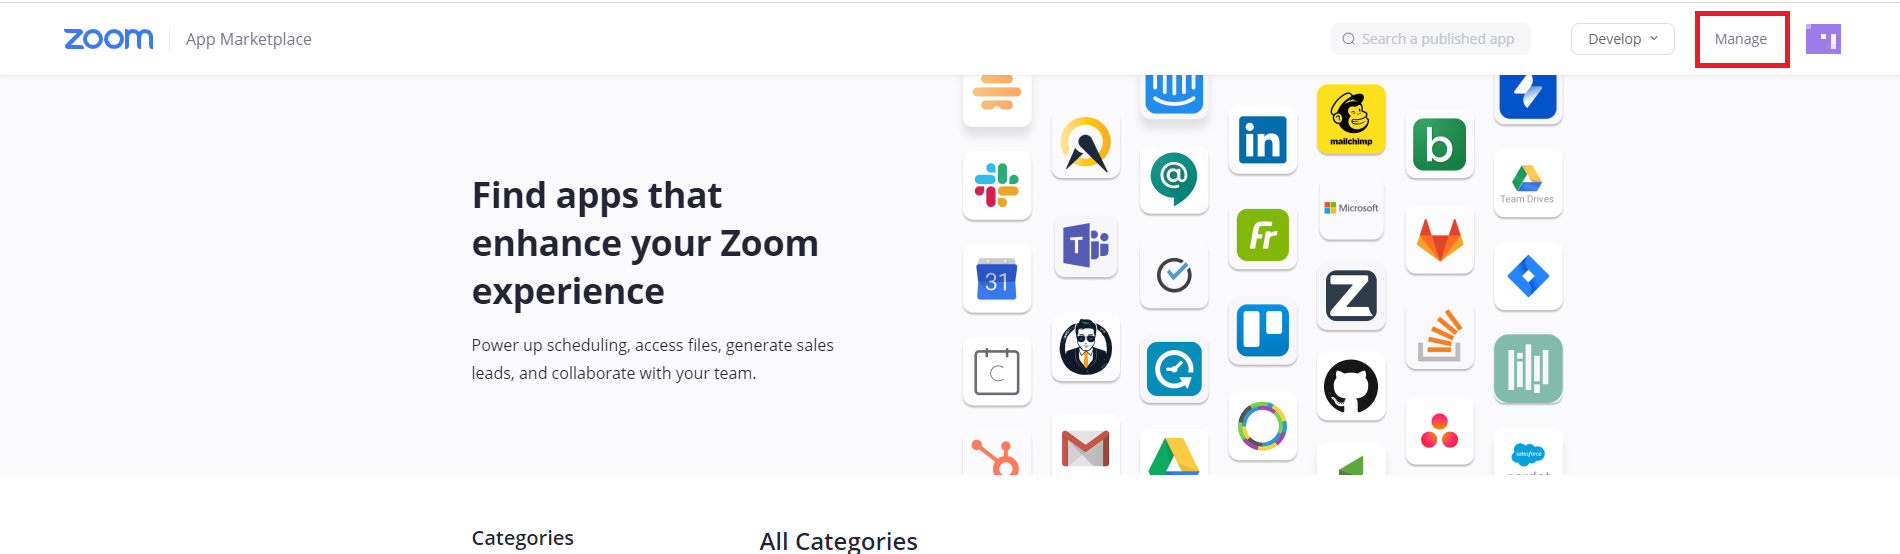
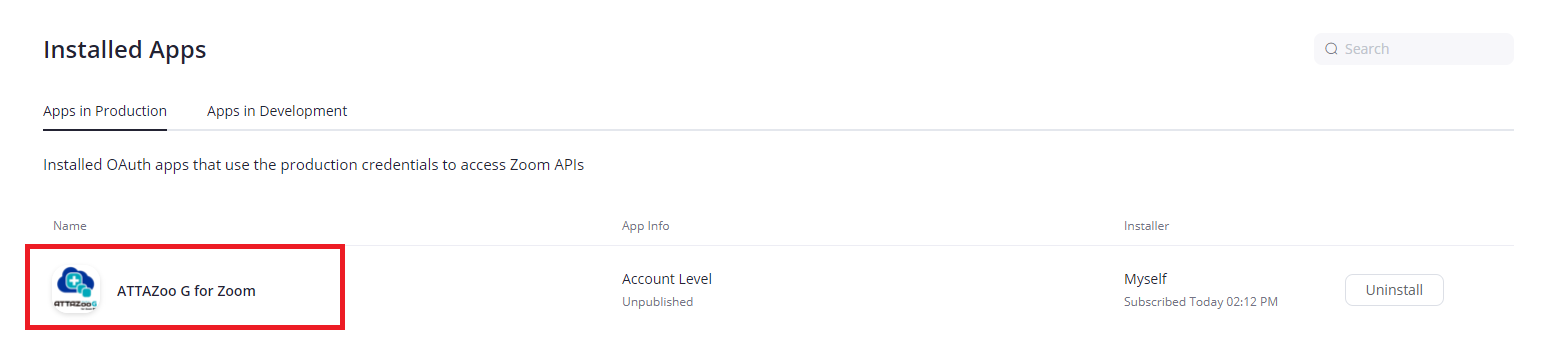
- Click Manage > Installed Apps or search for the ATTAZoo G for Zoom app.
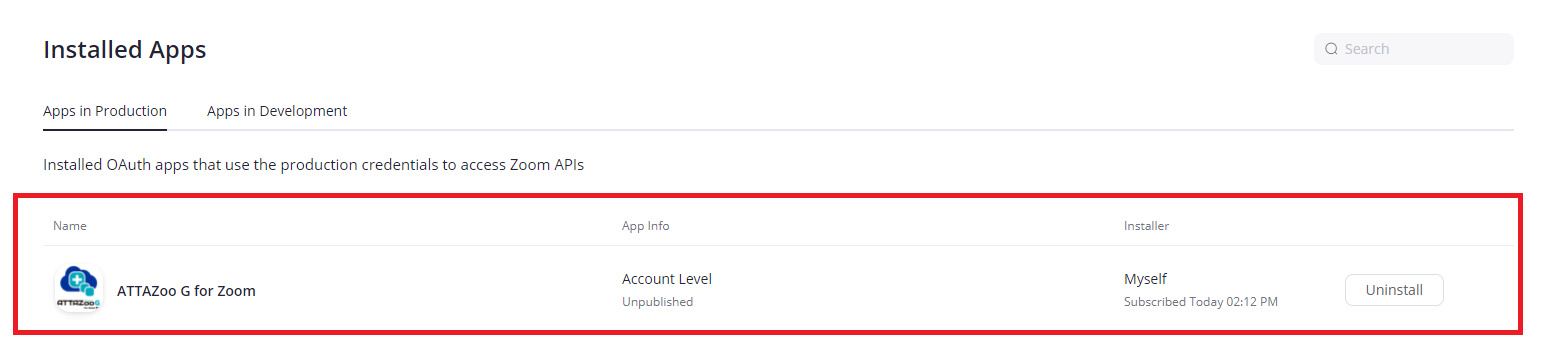
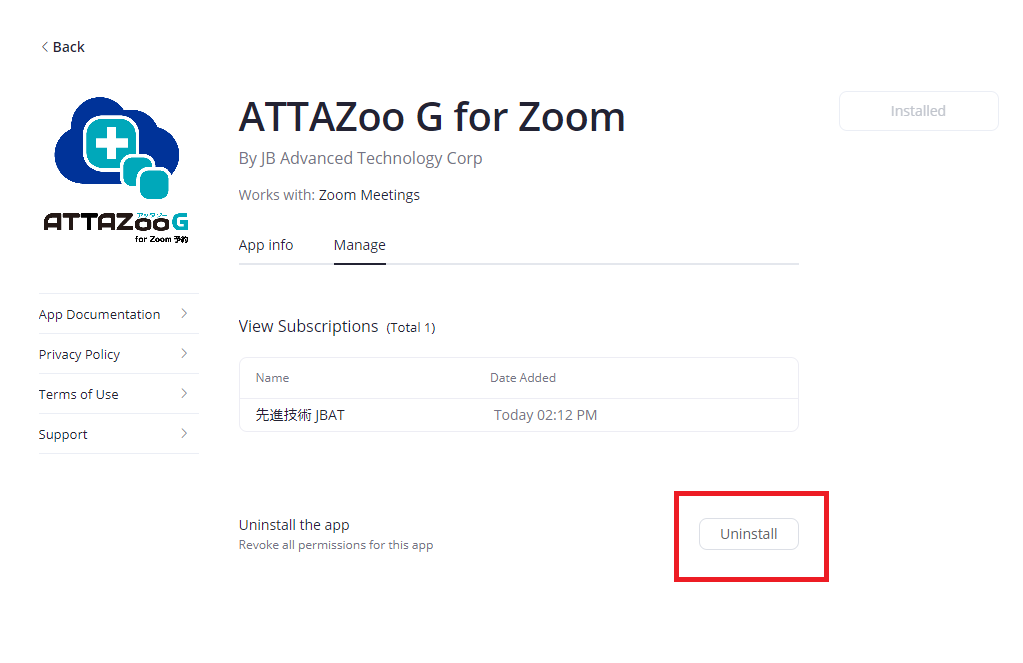
- Click the ATTAZoo G for Zoom app.
- Click Uninstall.
This completes the deletion of the product.
ATTAZoo G for ZoomUser's Manual
Overview
Thank you very much for purchasing our product "ATTAZoo G for Zoom". (We will refer to "ATTAZoo G for Zoom" as "this product" for the following explanation. This product is a plug-in for integrating the Garoon scheduling function with the Zoom meeting reservation system. This manual describes the basic operation methods and cautions. Please read it before using the plugin. Please note that the screens shown are only examples of operations. Please note that the contents displayed on the screen may differ depending on your operating environment.
Copyright/Precautions
The names of companies and products mentioned in this manual are trademarks or registered trademarks of their respective owners. No part of this manual may be copied or reproduced in any form or by any means without permission. The contents of this manual and product specifications are subject to change without notice. Although every effort has been made to ensure that the contents of this manual are correct, if you notice any unclear points, errors, omissions, or misprints, please contact us. However, if you find any unclear points, errors, omissions, or missing pages, please contact us.
Notation in This Manual
| Notation Target | Notation |
|---|---|
| Menus, Icons, Buttons, Windows, Tabs | The notation is enclosed in []. (e.g.) Click [OK]. |
| Keys on the keyboard | Use <> to enclose the text. (e.g.) Press the <Tab> key on your keyboard. |
| References | Chapters, sections, paragraphs and headings should be enclosed in "". (Example) Refer to "Chapter 2.1 Login and Logout". |
Chapter 1. Summary of This Product
1.1 Product Summary
This product is a Garron plugin that links the meeting reservation function of Zoom with the Zoom meeting reservations set up on Garoon. You can book meetings on your Garoon schedule.
1.1.1 What is ATTAZoo G for Zoom?
This is a Garoon plugin that allows you to integrate Garoon's scheduling function with Zoom's meeting reservation function.
- You can book a meeting on a Garoon schedule and a Zoom meeting all at once.
- Check for duplicate Zoom conferences and Zoom webinars when booking a meeting.
1.1.2 Caution
- Please do not delete the [Zoom URL] and [Meeting ID] in the notes on Garoon. Unexpected behavior may occur if deleted.
- A reserved Zoom meeting cannot be unreserved from Garoon. . To cancel a meeting, please go to Zoom and do so.
Chapter 2. Operation method
2.1 About Zoom Conference Booking
2.1.1 Register Zoom meeting schedule
This section explains how to register a Zoom conference to a Garoon schedule. In this example, the facility for the Zoom conference is registered as "Zoom". This may be different from the environment you are using, so please replace the name of the facility with the name of the Zoom conference facility that you set up when you installed this product. Please refer to the installation manual for details on registering to the facility.
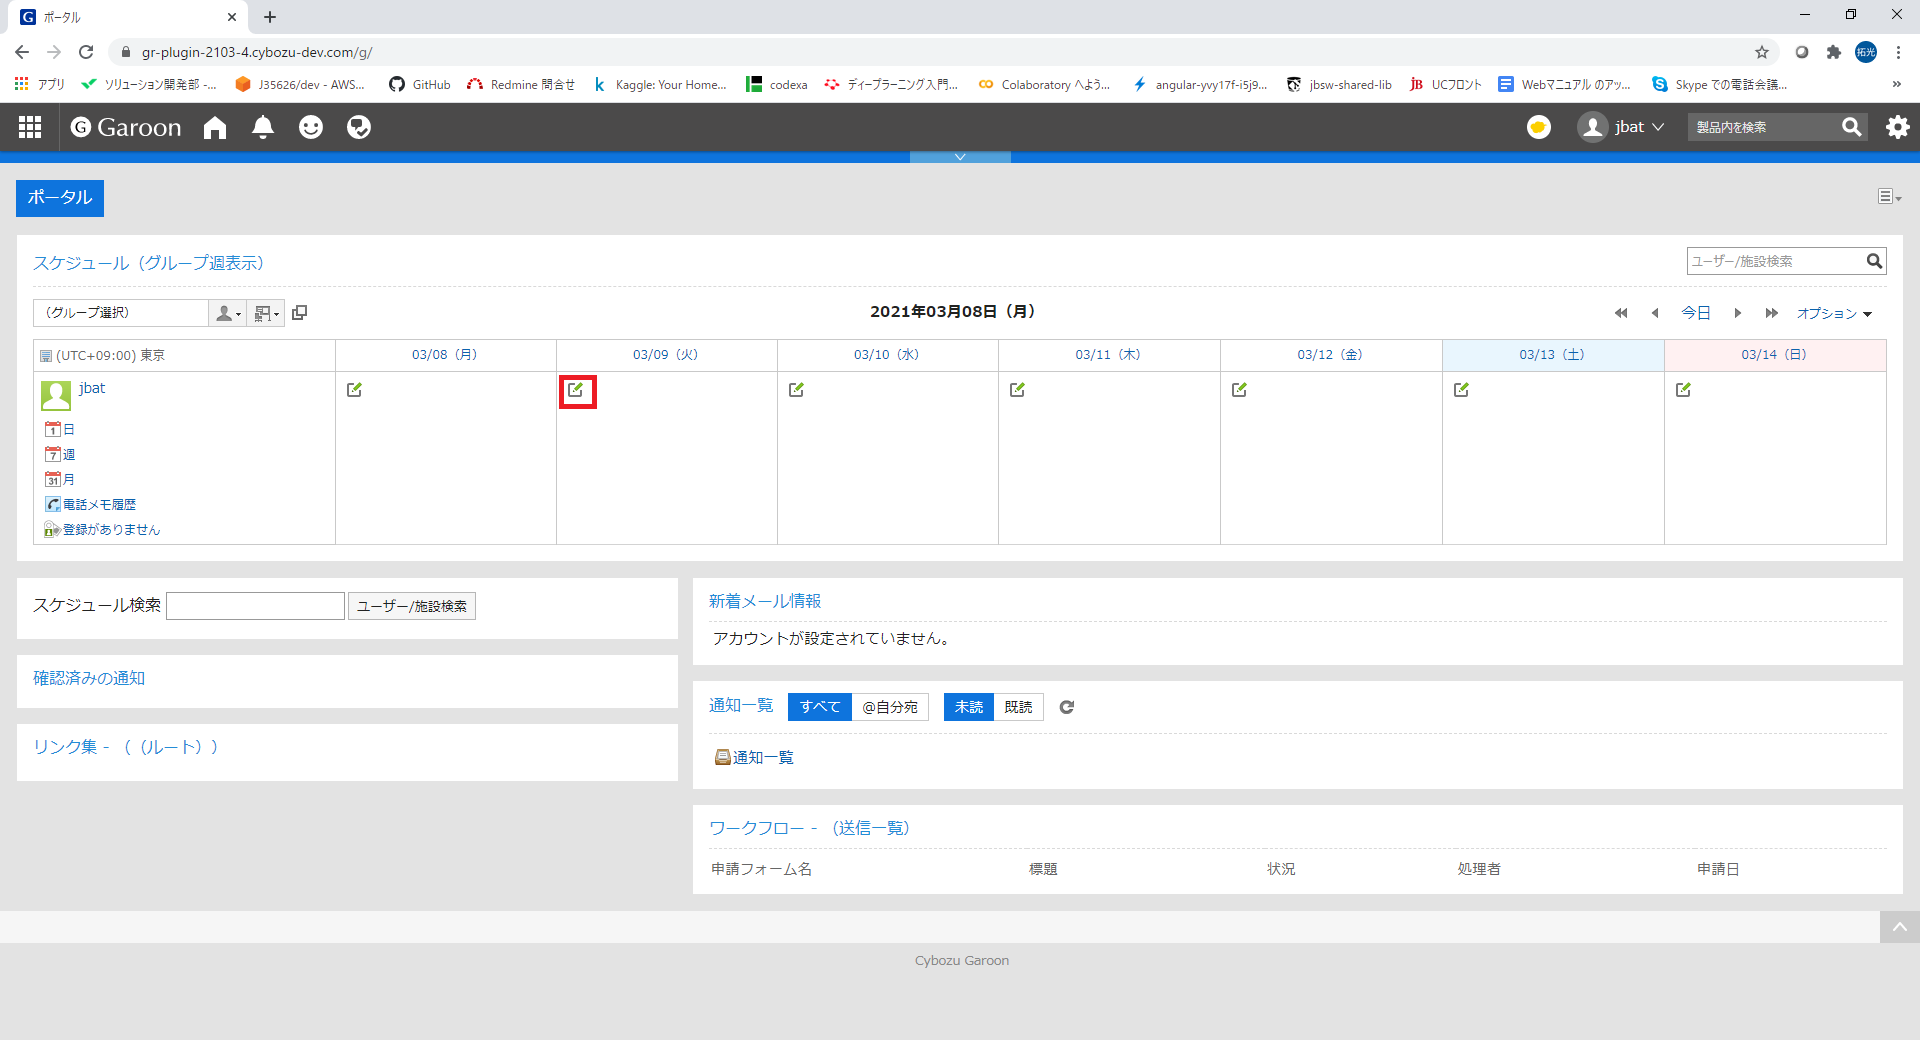
Open the [スケジュール] window of Garoon.
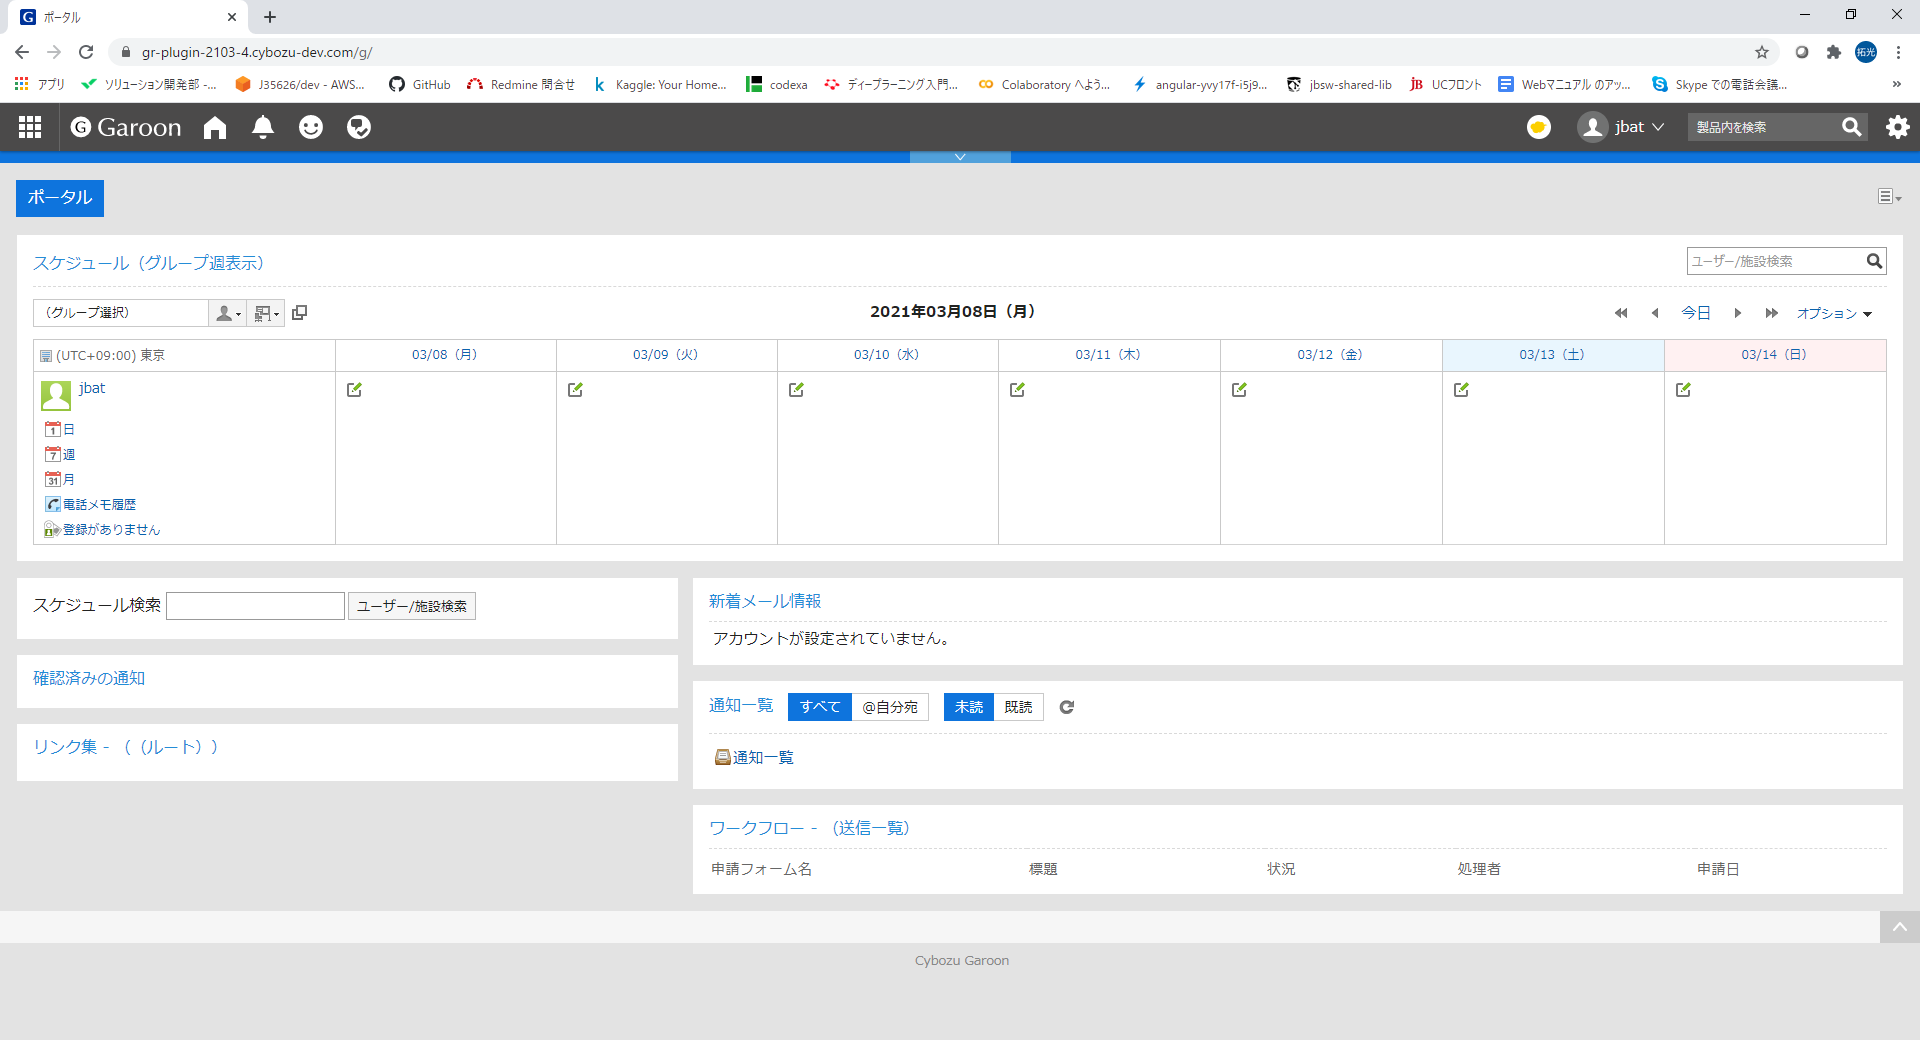
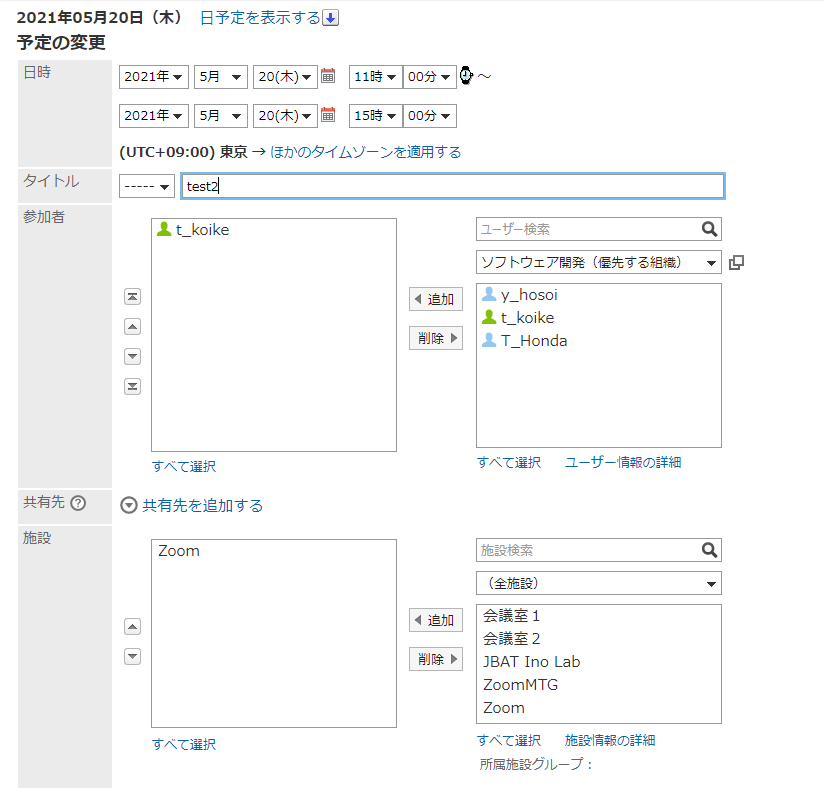
Open the [予定の登録] window in Garoon. Displays the [Add Event] screen for the desired date and time.

Enter the following items with the desired settings
- [日時]
- [タイトル]
- [参加者]

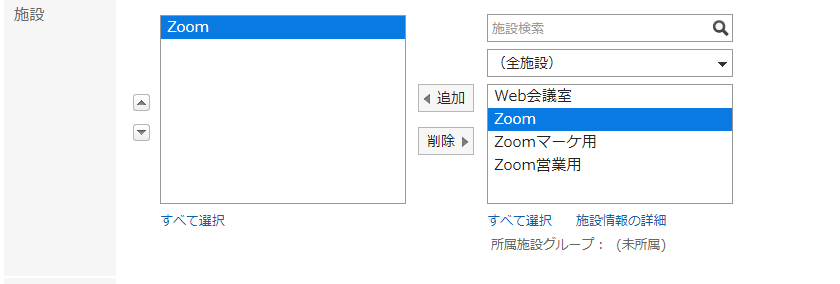
Select "Zoom" from the list of facilities and press [追加].
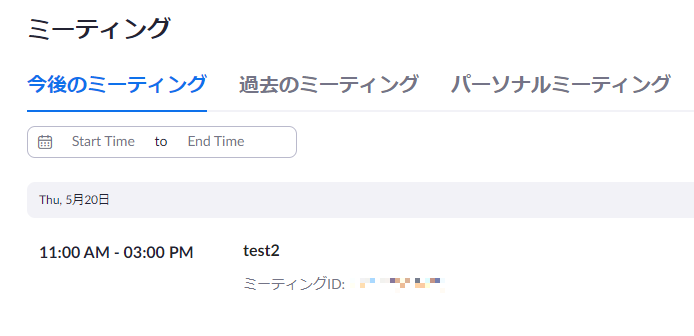
Press [登録する].
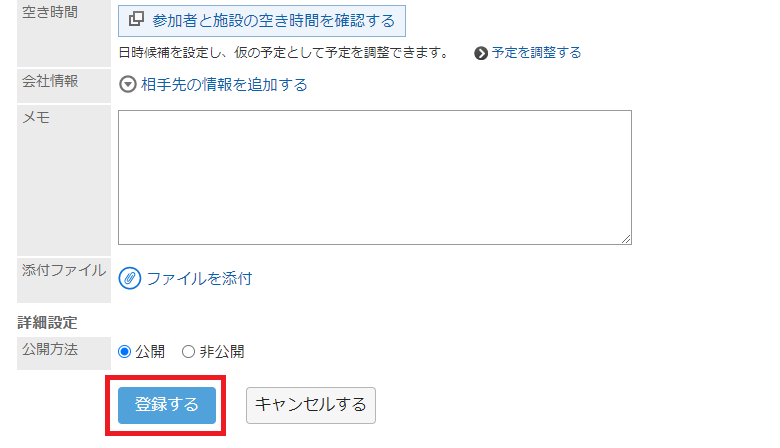
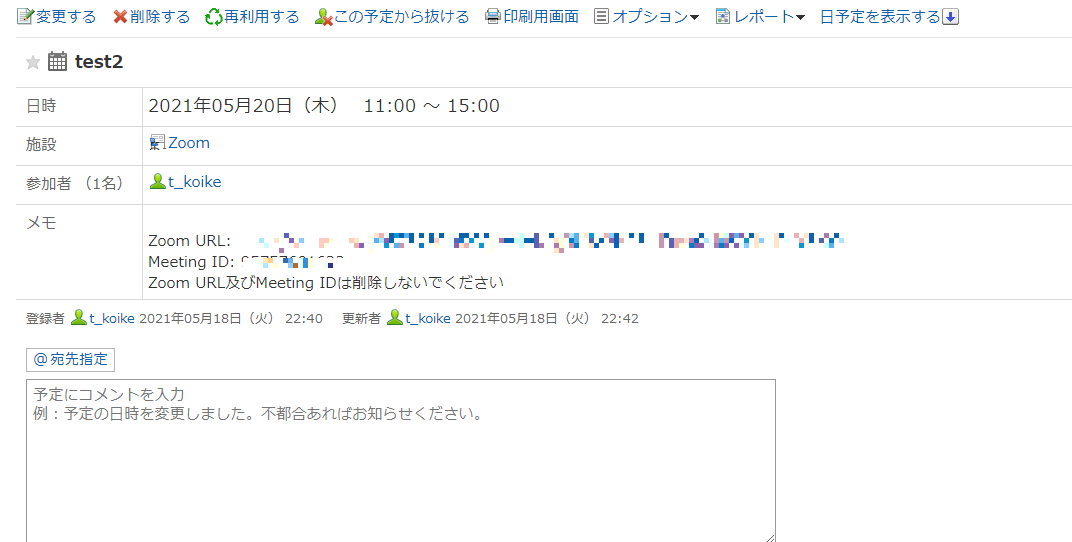
The schedule is registered.
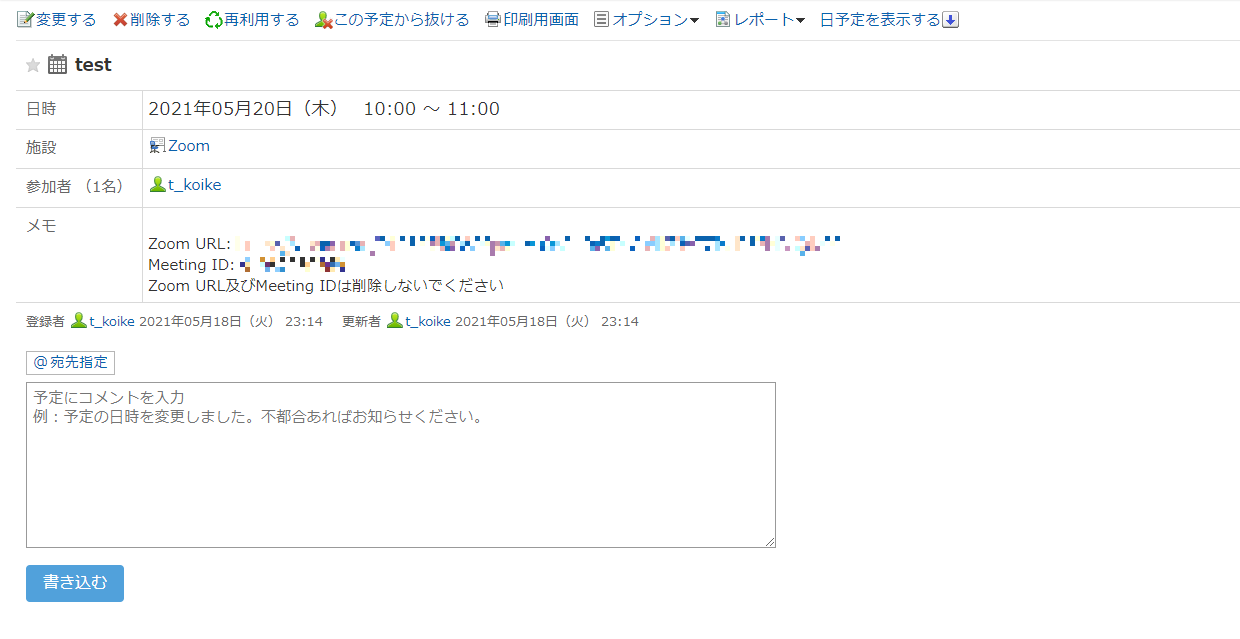
Attention.
Please do not delete the [Zoom URL] and [Meeting ID] in the notes on Garoon.
・Zoom URL ・Meeting ID
2.1.2 How to change your Zoom meeting reservation
You can change the schedule of a Zoom meeting in the same way you can change the schedule of a Garoon meeting. However, please be aware of the following points.
- Do not delete the Zoom URL and Meeting ID in the memo field.
- If the facility does not have a Zoom meeting facility, it will not be changed.
- You will not be able to change the Zoom conference facility. If you delete an already registered facility for Zoom conference and register another facility for Zoom conference, there is a possibility that it will behave unexpectedly.
- Only the meeting time can be changed. You cannot change the meeting name.
Displays the screen for changing the Garoon schedule for a Zoom conference.
Press [変更する]
Change the schedule.
Please note the following points regarding the change.
- Do not delete the Zoom URL and Meeting ID in the memo field.
- If you delete a facility for Zoom meetings from your facilities, you will not be able to make changes to your Zoom reservations
- You cannot change the Zoom facility. If you delete a Zoom facility that has already been registered and register another facility for Zoom conference, it may cause unexpected behavior.
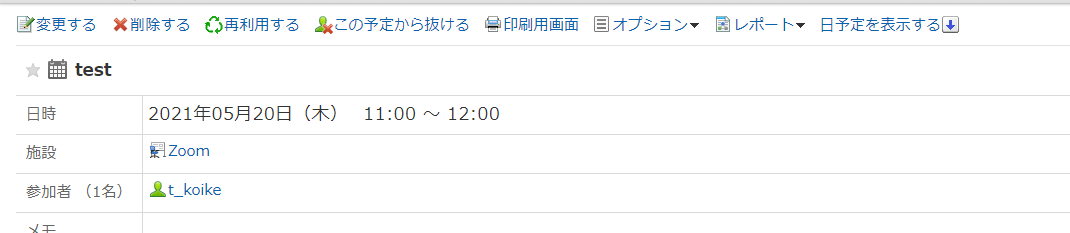
Press「変更する」 Make changes to the Zoom appointment with the changed information.
Zoom reservation has been changed.
2.1.3 How to delete a Zoom meeting reservation
Zoom meetings that have been reserved cannot be unreserved from within Garoon. Please follow the steps below to cancel a reserved Zoom meeting.
- The Meeting ID must be present in the memo field.
- There must be a facility for Zoom conferencing that you want to remove from your schedule.
- Select "全参加者の予定' appointments" as the target of deletion. If you select "自分の予定だけ", the Zoom appointment will not be deleted.。
- An error will occur if the reservation on the Zoom side could not be deleted for some reason. In that case, please go to Zoom and delete the Zoom reservation directly. Also, the deletion of the Garoon schedule will be suspended. Once you have changed the schedule, remove the facility for the Zoom conference from the facility, save it, and then delete the schedule.
- Open Garoon and delete the corresponding Zoom meeting schedule.

- Select "All participants' schedule" as the target and press "Yes".
If you choose "Only my appointments" as the target, the Zoom appointment will not be deleted.
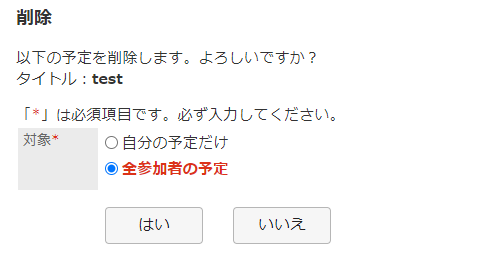
- A reserved Zoom meeting will be deleted.
Completed deleting the meeting.